Find What You're Looking For:

Tuesday, July 26, 2016

Watermelon Cucumber Cooler Cocktail


watermelon cucumber cocktail 

Refreshing, lightly sweetened and spiked watermelon and cucumber juice!

Yields 2 cocktails

Ingredients:

  • 2½ cups watermelon, seeds removed, cut into chunks
  • ½ large English cucumber, peeled and cut into chunks
  • 2 limes, juiced
  • 1 tablespoon honey or agave nectar
  • 3 ounces vodka
  • Optional garnishes: cucumber slice, lime slice and/or small watermelon wedge

Instructions:

Place a fine mesh sieve over a large bowl or pitcher.

In a blender, puree the watermelon and cucumber chunks.

Pour mixture through the sieve into the bowl. Use the back of a big spoon or rubber spatula to squeeze all the juice into the bowl.

In a small bowl, stir together lime juice and honey.

Pour the lime juice and honey mixture into the watermelon and cucumber juice, along with vodka. Adjust sweetness with more honey if desired.

To serve, fill two glasses with ice and top each with cocktail. Garnish with cucumber and lime slices.

Author: Cookie and Kate

Spicy Watermelon Margaritas

Spicy watermelon margarita recipe - cookieandkate.com


Serves: 1 cocktail

These watermelon margaritas are refreshing, with a kick! They're easy to make and naturally sweetened. Skip the chili powder and jalapeño for a classic watermelon margarita! 

Ingredients:

Watermelon juice

  • 1 small seedless watermelon, or half of a larger watermelon

Chili-salt rims

  • 1 part kosher salt
  • 1 part ancho chili powder or regular chili powder
  • Lime wedges

Ingredients per margarita

  • 2 ounces fresh watermelon juice
  • 1½ ounces tequila, preferably 100% agave silver or blanco tequila
  • ¾ ounce fresh lime juice
  • ½ ounce fresh orange juice
  • ½ teaspoon agave nectar or simple syrup, more to taste
  • 1 thinly sliced jalapeño round (1/4th inch wide, a little goes a long way!)
  • Optional garnish: 1 tiny watermelon wedge


Instructions:

To make the watermelon juice, scoop the watermelon flesh into your blender and blend until it has turned into a smooth juice. Depending on your watermelon, you may or may not need to strain out the pulp (if it's too pulpy for your liking, pour it through a fine mesh strainer, pressing the liquid through with a big spoon).

To prepare your margarita glasses: 
On a small, rimmed plate, mix together equal parts salt and chili powder. I like to use my fingers to rub the chili powder into the salt (be sure to wash your hands afterward). Run a wedge of lime around the top of each glass. Dip the top of the glass into the salt blend at a 45-degree angle and roll it from side to side to catch the salt. Add ice cubes to your glass and set it aside.

To make margaritas (feel free to make multiple margaritas at once): 
Fill a cocktail shaker with ice. Pour in the watermelon juice, tequila, lime juice, orange juice, agave nectar and top with a jalapeño slice.

Secure the lid to the shaker and shake for 30 seconds. Taste and add additional sweetener if necessary. Strain the liquid into your prepared glass(es). Cheers!

Source:  Cookie and Kate

Watermelon Mimosas

Super simple and refreshing watermelon mimosas - cookieandkate.com

Serves: 6 cocktails

These watermelon mimosas are a refreshing summer brunch cocktail. They're great any time of day, really! Recipe yields enough watermelon juice to make one Champagne bottle's worth of mimosas (that's 6 to 8 mimosas, depending on how boozy you like them).

Ingredients:

  • ⅓ medium watermelon, preferably chilled (seedless watermelon is the easiest to work with, but sugar baby watermelons are the most tasty)
  • 1 bottle Champagne, chilled (I like brut Champagne, but if you like sweeter Champagne, that works, too)
  • Optional, for extra sweetness: simple syrup or St. Germain, to taste
Learn how to make watermelon mimosas, so easy! cookieandkate.com

Instructions:

First, make watermelon juice: If your watermelon is not seedless, remove all of the black seeds first. Then, scoop all of the pink watermelon flesh into your blender, leaving the sour green part around the perimeter behind.

Secure the lid on the blender and blend until it is completely smooth. Pour the watermelon juice through a fine-mesh strainer into a liquid measuring cup or bowl. Use a spoon to stir and press all of the juice through the strainer, then discard the solids.

how to make watermelon juice

To prepare the mimosas: Fill each Champagne flute about halfway up with Champagne (you may need to do this just a little bit at a time to avoid overflow). Then, carefully fill each glass with watermelon juice, leaving about an inch of room at the top.

Taste, and if you'd like it to be a little sweeter, add a tiny splash of simple syrup or St. Germain—this will really depend on the sweetness of the watermelon and your taste buds. Serve immediately!

Source:  cookieandkate.com

Friday, July 22, 2016

Healthy Seven Layer Dip

This 7 layer dip recipe features layers of freshly prepared "refried" black beans, guacamole, salsa and pico de gallo! cookieandkate.com

This healthy Tex-Mex layer dip is made with fresh ingredients! Homemade "refried" black beans, guacamole, salsa verde, pico de gallo and more. It's vegan and dairy-free, too. Recipe yields enough dip for 4 to 8 people, depending on serving sizes.

Serves: 6

Ingredients

Refried black beans

  • 2 teaspoons extra-virgin olive oil
  • ¼ cup finely chopped yellow or white onion (about ¼ medium onion)
  • 1 clove garlic, pressed or minced
  • 1 teaspoon ground cumin
  • 1 can (15 ounces) black beans, rinsed and drained, or 1½ cups cooked black beans
  • ¼ cup water
  • ¼ teaspoon salt
  • Freshly ground black pepper, to taste

Quick guacamole

  • 2 medium avocados, halved and pitted
  • 1 tablespoon lime juice (about ½ medium lime)
  • ¼ teaspoon salt

Pico de gallo

  • 1 large or 2 medium tomatoes, chopped (about 1½ cups chopped)
  • ¼ cup finely chopped yellow or white onion
  • ¼ cup chopped fresh cilantro
  • 1 tablespoon lime juice (about ½ medium lime)
  • ¼ teaspoon salt

Remaining layers

  • ½ cup salsa verde, homemade or jarred, or your favorite salsa
  • Handful of chopped pickled jalapeños (optional, if you like spice)

Instructions

To cook the black beans: In a small saucepan over medium heat, warm the olive oil until shimmering. Add the onions and a few dashes of salt. Cook, stirring occasionally, until the onions have softened and are turning translucent, about 3 to 6 minutes.

Add the garlic and cumin. Cook, stirring constantly, until fragrant, about 30 seconds. Pour in the drained beans and water. Stir, cover and cook for 5 minutes. Reduce the heat to low, then remove the lid and use a potato masher or the back of a fork to mash up about at least half of the beans. Continue to cook the beans, uncovered, stirring often, for 3 more minutes.

Remove the pot from the heat and stir in the salt and pepper. Taste, and add more salt and/or pepper if necessary. If the beans seem dry, add a very small splash of water and stir to combine. Spread the beans into an even layer in a shallow, medium-sized serving bowl.

To prepare the guacamole: Use a spoon to scoop the flesh of the avocado into a small mixing bowl. Add the lime juice and salt. Mash with a clean potato masher or fork until the mixture is blended and no longer chunky. Taste and add additional lime juice and/or salt, if necessary. Spread the guacamole on top of the beans, leaving the outer ½" of beans visible for presentation value.

To avoid watering down your dip, drain the salsa in a fine mesh colander, or use a fork to transfers the solids onto the guacamole, again leaving the outer ½" of the guacamole visible.

To prepare the pico de gallo: In a medium bowl, combine the tomatoes, onion, cilantro, lime juice and salt. Stir to combine, then use a fork to pile the pico on top of the salsa, leaving behind as much of the juices as possible. Top with a sprinkle of chopped pickled jalapeño, if using.

NOTES
Recipe created with reference to All Recipes.

STORAGE SUGGESTIONS: This dip is really best consumed soon after preparing, but I enjoyed leftovers the next day. Press plastic wrap against the surface to help prevent the guacamole from browning.

MAKE IT QUICKLY: Substitute about 1½ cups each store-bought refried black beans and guacamole. 

Source:  COOKIE AND KATE

Wednesday, July 20, 2016

Jalapeño Lemon Herb Pesto


Ingredients

  • 1 cup lightly packed fresh parsley
  • 1 cup lightly packed fresh cilantro or basil
  • 1 to 2 medium jalapeños, roughly chopped (remove seeds and membranes for less heat), optional
  • 1 medium lemon, juiced
  • 1 medium garlic clove, roughly chopped
  • ½ teaspoon salt
  • ½ cup pepitas (green pumpkin seeds) or slivered almonds
  • ½ cup olive oil
  • Freshly ground black pepper, to taste


Instructions

Toast the pepitas in a small skillet over medium heat, stirring frequently, until they are making little popping noises and turning lightly golden on the edges. Set aside to cool a bit.

To make the pesto, combine the herbs, jalapeño, lemon, garlic and salt in a food processor. Pour in the pepitas. Pulse a few times and then run the machine while drizzling in the olive oil until the mixture is well blended, scraping down the bowl as necessary.

Source:  Cookie and Kate

Summertime Pasta Salad with Tomatoes, Corn and Jalapeño Pesto

Healthy summertime pasta salad! cookieandkate.com

Serves: 8 cups

This healthy pasta salad features bold summer flavors, including tomatoes, corn and black beans tossed in spicy, fresh pesto! It's a great vegetarian side dish for potlucks and barbecues. 

This recipe keeps well for several days in the refrigerator, covered. Leftovers are great served warm or chilled. If you want to change it up/stretch it out, add some fresh, leafy greens and a drizzle of lemony dressing.

Ingredients

Pasta salad

  • ½ pound whole grain bow-tie pasta or rotini or penne
  • 1 (14-ounce) can black beans, rinsed and drained
  • 1 pint cherry tomatoes (10 ounces), sliced into thin rounds
  • 1 ear fresh corn, shucked (about ½ cup fresh corn kernels)
  • ½ to ¾ cup crumbled feta or diced avocado


Jalapeño herb pesto

  • 1 cup lightly packed fresh parsley
  • 1 cup lightly packed fresh cilantro or basil
  • 1 to 2 medium jalapeños, roughly chopped (remove seeds and membranes for less heat), optional
  • 1 medium lemon, juiced
  • 1 medium garlic clove, roughly chopped
  • ½ teaspoon salt
  • ½ cup pepitas (green pumpkin seeds) or slivered almonds
  • ½ cup olive oil
  • Freshly ground black pepper, to taste

pasta salad ingredients

Instructions
Bring a large pot of salted water to boil. Cook the pasta until al dente, according to package directions. Before draining, reserve about a cup of cooking water. Drain and return to pot. Set aside.

Toast the pepitas in a small skillet over medium heat, stirring frequently, until they are making little popping noises and turning lightly golden on the edges. Set aside to cool a bit.

To make the pesto, combine the herbs, jalapeño, lemon, garlic and salt in a food processor. Pour in the pepitas. Pulse a few times and then run the machine while drizzling in the olive oil until the mixture is well blended, scraping down the bowl as necessary.

Pour enough pesto into the pasta to lightly coat it once tossed (you might not quite need all of it). Add a small splash of pasta cooking water and toss well. 

Transfer the pasta to a large serving bowl and add the drained black beans, sliced cherry tomatoes, fresh corn and feta or avocado. Stir until combined. This salad tastes best after it's had a chance to marinate for about 30 minutes, but you can serve it right away if need be.

Notes
MAKE IT VEGAN/DAIRY FREE: Omit the cheese and use diced avocado instead.
MAKE IT GLUTEN FREE: Use gluten-free pasta. 
MAKE IT NUT FREE: Be sure to use pepitas, which are seeds, rather than nuts
VARIATIONS:  If you’re sensitive to spice or find the idea of jalapeño in pesto to be downright strange (I think it’s lovely), you can skip it altogether. For less spice, be sure to remove all the membranes and seeds from the jalapeño. You might also taste the jalapeño beforehand to make sure you haven’t gotten an overpoweringly spicy pepper on your hands.

Feel free to change up the herbs in the pesto, too. I’m crazy for cilantro but basil would be great, too (or just double the parsley for parsley pesto). If you find the pesto to be too strongly flavored for you, try letting it rest for 30 minutes or mixing in some Parmesan to temper the flavor a notch.
I love the salty, creamy feta in this recipe, but for a dairy free/vegan version, replace it with avocado. You might need to add a bit more salt, to taste. Sun-dried tomatoes are a great add-in, if you have some. I like the dehydrated kind from Trader Joe’s, which are somehow still pliable enough to eat right out of the bag.
Source: Cookie and Kate

Bing Cherry Muffins *


These muffins are super moist and delicious.  I scoured the internet for recipes to use for the 10 lbs of bing cherries that I got this summer and nothing really jumped out at me.  I read many recipe reviews and after taking into consideration all baker's comments and various recipes - I made my own.  Here it is.... will definitely make again.  

This is a great "base" recipe to add any kind of fruit (blueberries, lemon zest and poppy seeds with a lemon drizzle frosting etc).

Makes 12 muffins

Ingredients
  • 1/2 tsp Baking Powder
  • 1/2 Cup Coconut Flour
  • 1/2 tsp Sea Salt
  • 4 eggs
  • 1 mashed banana
  • 6 T Coconut Oil
  • 1/2 Cup Honey or Maple Syrup OR 3/4 Cup Xylitol
  • 1/2 tsp Vanilla Extract
  • 1/2 tsp Almond Extract
  • 1/2 Cup Sliced Almonds for topping
  • 1/4 Cup Sugar for topping
  • 1 Cup Diced Bing Cherries
Instructions
Sift together the coconut flour, salt and baking powder.  Mix together all of the wet ingredients.  Combine the wet and dry ingredients and let stand for 7-10 minutes, giving the coconut flour time to absorb the wet ingredients. The batter will seem very wet.

Fold in the bing cherries gently so that the muffins don't turn purple!

Spray a muffin tin or silicone muffin pan, or use paper muffin liners.  Use an ice cream scoop full of batter in each cup. Top with slivered almonds.


Bake 18 minutes or until top is golden brown.  Remove and let cool in the muffin pan.  While still hot, sprinkle the top of each muffin with some extra sugar (xylitol).

These freeze really well too.  Place in a zip lock bag.

Source:  Me

Friday, July 15, 2016

Pumpkin Tiramisu


My contribution to the grand Thanksgiving dinner menu!

May I present: Vegan, grain free and gluten free Pumpkin Tiramisu, sweetened with maple syrup and topped with delicious coconut whipped cream!


Serves: 4

Ingredients
  • 2 cups raw cashews
  • 1 can full fat coconut milk, refrigerated over night
  • 4 tablespoon maple syrup, divided
  • 1 teaspoon vanilla extract, divided
  • ½ cup fresh squeezed lemon juice
  • ⅓ cup + 2 tablespoon coconut oil, melted
  • 16 oz pumpkin puree
  • ¼ teaspoon ground ginger
  • ½ teaspoon cinnamon
  • pinch of nutmeg
  • 4-6 large cookies of your choice (or these cookies are great in it too)
  • Raw cacao powder, for dusting
Instructions
Soak cashew nuts in water for at least 2 hours.

Carefully remove the can of coconut milk from the fridge - do not shake! Scoop out the coconut cream that has accumulated at the top of the can into a medium bowl. Discard remaining coconut liquid or save for use in a different recipe.

Add 1 tablespoon of maple syrup and ½ teaspoon vanilla extract to the coconut cream and whip with a hand mixer. It may take several minutes for the cream to stiffen so be patient! Store in the refrigerator.

Drain and rinse cashews and combine with lemon juice, 3 tablespoon maple syrup, ½ teaspoon vanilla extract and coconut oil in a food processor. Blend on high speed until smooth; it may take several minutes to achieve a non-gritty texture.

Drop about 1 - 1.5 tablespoon of the cashew cream into your dessert glasses so the bottom is covered. Now add the pumpkin puree to the remaining cashew mixture in your food processor together with the ginger, cinnamon and nutmeg and blend until smooth. Taste for sweetness; add more sweetener if needed.

To assemble the tiramisu, crumble cookies between your fingers and divide evenly between your dessert glasses, then top with pumpkin-cashew cream and 1-2 tablespoon of coconut whipped cream. 

Dust with cacao powder and refrigerate for at least 3hours before serving. Enjoy!

Notes
Your dessert glasses should hold at least 10 fl oz which would fill them to the rim. If you plan to cover the glasses, you may need bigger containers.

If you do not have time to soak the cashews, you may have to add extra liquid to the cashew cream mixture; about 1-2 tablespoon of filtered water or coconut milk.

These can last up to 3 days in the refrigerator.

Source: Rose | The Clean Dish

Double Chocolate Cookies with Himalayan Pink Salt


Ingredients

  • ½ cup shredded coconut
  • 1½ cups cashew or almond flour
  • 2 tablespoon tapioca flour
  • 2 tablespoon coconut flour
  • ½ cup raw, unsweetened cacao
  • ½ teaspoon (sea) salt
  • ½ teaspoon baking powder
  • ½ cup raw virgin coconut oil, melted
  • ⅓ cup maple syrup (or similar sweetener)
  • 2 teaspoons vanilla extract
  • ¾ cup mini chocolate chips

Instructions
Preheat oven to 325F and line a baking tray with parchment paper.

Toast shredded coconut for 4-5 minutes until golden, set aside and allow to cool down. Increase oven temperature to 350F.

Combine all dry ingredients (except chocolate chips) in a large bowl and mix well.

Next, add together all wet ingredients in a separate bowl and whisk to incorporated, then combine with dry ingredients.

Add chocolate chip cookies and stir everything until well incorporated. Allow cookie batter to sit for 10 minutes at room temperature.

Spoon one rounded tablespoon of cookie mixture onto your baking tray with a two inch space inbetween. Sprinkle with cacao nibs and coarse Himalayan pink salt (optional).

Bake for 9-11 minutes and allow to cool down on the baking tray for at least 5-7 minutes (otherwise, they will crumble).

Transfer to a cooling rack and allow to reach room temperature before serving.
Enjoy!

NOTES
I used semi-sweet mini chocolate chips. If your chocolate chips are unsweetened, you may want to use a tad more maple syrup (or other natural sweetener), to taste.

Author: Rose | The Clean Dish
Monday, July 11, 2016

Fresh Squeezed Lemonade


Yummm....Nothing says summer like a glass of freshly squeezed lemonade!  It doesn't compare to any store bought lemonade filled with artificial ingredients and sweeteners.  I make it sugar free too but you don't have too!

Ingredients:
  • 5 lemons
  • 1 to 1 1/2 cup sugar or Powdered Stevia/Xylitol (make sure it is equal measurements to sugar on the package) - depending how sweet you like it.  Start with 1 cup and add accordingly
  • 8 cups water

Instructions:

In a small saucepan, combine sugar and 1 cup water. Bring to boil, turn off and then stir in sugar until it is dissolved.  Allow to cool to room temperature or place in the refrigerator for chilling.  

Prep the lemons (see note prior to juicing below).  Peel, cut in half and juice them into a small bowl.  Remove seeds from lemon juice. Leave in the pulp but if you don't like the pulp, strain the juice prior to adding to the pitcher.   In pitcher, stir together chilled syrup, lemon juice and remaining 7 cups water.

Notes:

Make sure you peel your lemon with a vegetable peeler prior to cutting it and squeezing it.  You can use these peels in limoncellocleaning spraylemon garlic oil or dry them for fire starters!

A couple of tricks to make sure you get the most juice out of your lemonade:

  • Microwave each lemon for 15 minutes, then roll it on the counter before you cut it, peel it and squeeze it. 

OR

  • Soak the lemons in hot water for 10 mins and roll each lemon on the counter before you cut, peel and squeeze it. 

Source:  Me


Friday, July 8, 2016

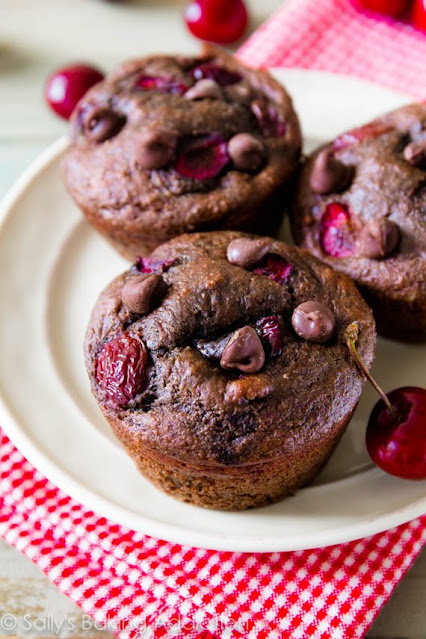
Chocolate Cherry Muffins


SERVES: 8-10 muffins

INGREDIENTS:

  • 4 large eggs
  • ¼ cup honey
  • 1 teaspoon vanilla extract
  • ¼ cup cacao butter, melted
  • ¼ cup coconut milk
  • ¼ cup coconut flour
  • ½ cup blanched almond flour
  • ¼ cup raw cacao powder
  • 1 teaspoon baking soda
  • ½ teaspoon salt
  • ¼ cup chocolate chips (I use Enjoy Life for soy, dairy, and gluten free)
  • ¾ cup sweet cherries, pitted and roughly chopped


INSTRUCTIONS:

Preheat your oven to 350 degrees and line a 12 cup muffin pan with cupcake liners.

In a stand mixer fitted with a paddle attachment, cream the eggs with the cacao butter for 30 seconds to a minute on medium high speed. Add the honey, vanilla and coconut milk then beat for a minute longer until fully incorporated.

Combine the coconut flour, almond flour, cacao powder, baking soda, and salt in a small bowl.

Using a sifter or a fine mesh strainer, sift the dry ingredients into the wet. Beat for one minute, scraping down the sides to make sure everything is mixed well.

Stir in the chopped cherries and chocolate chips by hand. The batter should be fairly thick and lumpy. Spoon the batter into the prepared muffin pan, filling each cup to ¾ full.

Bake for 18-20 minutes. These are dark so it’s hard to tell when they are done by sight, but a toothpick should come out clean and the cake should bounce back when you press your finger gently into the top. Try not to over bake them or they will be too dry!

I store half in the freezer for later use, and keep the other half on the counter tightly wrapped for 3-4 days.

Source:  AgainstAllGrain.com

Cherry Blondies


Yield: 9 Cherry Blondies

Ingredients

  • 1 1/2 cups (200 g) Blanched Almond Flour
  • 1/4 teaspoon Baking Soda
  • 1/4 teaspoon fine Sea Salt
  • 1/2 teaspoon ground Cinnamon
  • 1/4 cup (45 g) Coconut OIl, melted
  • 2 larger Eggs, whisked
  • 1/4 cup pure Maple Syrup (I like grade B)
  • 1 teaspoon Vanilla Extract
  • 2 cups Cherries, pitted & cut in half
  • Coconut Oil Cooking Spray

Instructions
Pre-heat oven to 350 degrees F with the rack in the middle. 

Spray & line an 8X8 baking pan with parchment paper. 

In a bowl whisk together dry ingredients. In another bowl combine wet ingredients. Combine all ingredients in one bowl & mix together to form a batter. 

Fold in the cherries last. 

Bake about 20-25 minutes until a toothpick comes out of the center virtually crumb free.

Source:  marlameridith.com


Dark Chocolate Cherry Brownies (Paleo)


Serves: 3-6

Ingredients

  • 1 banana
  • 1.5 cups fresh cherries, cut in half and seeds removed
  • 3 eggs, whisked
  • ¼ cup Coconut Oil, melted
  • ⅓ cup raw honey
  • ½ cup Enjoy Life Chocolate Chips
  • 3 tablespoons Coconut Flour
  • 2 tablespoons unsweetened cocoa powder
  • ¼ teaspoon baking powder
  • ¼ teaspoon vanilla extract
  • ¼ teaspoon cinnamon
  • pinch of sea salt

Instructions
Preheat your oven to 350 degrees.

Add banana and 1 cup of cherries (leave out ½ cup of cherries for the filling) to your food processor. Puree banana and cherries until completely broken down.

Add wet ingredients to a bowl: coconut oil, honey, vanilla, and whisked eggs then pour in pureed banana and cherries. Mix thoroughly.

Add dry ingredients: coconut flour, cocoa powder, baking powder, cinnamon, salt and chocolate chips.

Fold in remaining diced cherries.

Pour into an greased 8x8 glass baking dish.
Bake for 30-35 minutes or until a toothpick comes out clean when you poke at it.

Let rest to cool a bit.

Source:  paleomg.com

Monday, July 4, 2016

How to Freeze Fresh Sage, Tarragon, and Mint

Fall may be approaching and you are looking at your abundance of herbs and wishing that you could have the freshness all winter long. Well, my friend, you can.


Tarragon

Sage

Mint

I used the same process for tarragon, mint, and sage, except I did use my garden scissors to cut the sage from the stems, which was easy to do. Since I'd learned that when freezing thyme and rosemary that the leaves of those herbs mostly fell off the stems when they were frozen, I decided not to spend the time stripping off the tarragon and mint leaves. For each of these herbs, I cut as much as I thought would fit into a large Ziploc bag and washed it well in my large salad spinner.

When they were spun dry, I put the herbs into the Ziploc bags. Then I left the bags open and let them sit on the counter for several hours, until the moisture left on the leaves had evaporated. If it's humid, allow a bit more time.

Then I sealed the bags, squeezing most of the air out, and put them in the freezer. Leave them for a few days or even weeks, depending on the type of herb.

After that time, the leaves will start to fall off the stems. This is a bowl of frozen tarragon after four days in the freezer, and you can see the bare stems where the leaves have fallen off. There were only a few stubborn leaves I had to pick off.

Not a very good photo because I took it at night, but here are the jars of frozen sage and tarragon leaves I ended up with. Each is slightly smaller than a mayonnaise jar, plenty of sage and tarragon for a lot of good dishes all winter long. Put the jars back in the freezer, then take out the frozen herbs as you need them. (The mint leaves are taking a bit longer to fall off the stems so I'm leaving them in the freezer a bit longer, but the frozen mint is also working out well.)

Source:  Kalyn's Kitchen

How to Freeze Fresh Rosemary and Thyme

How to Freeze Fresh Herbs:  Rosemary and Thyme found on KalynsKitchen.com

Did you know that many fresh herbs can be frozen in the summer when they're abundant and then used all through the winter? This post shares tips on how I freeze rosemary and thyme from my garden.


Even though it's still quite warm in MN, I am already anticipating fall approaching, and can feel the nights getting a bit cooler, and I know it's not that long until the garden goodness has to either be preserved or lost. I hate losing anything that comes from my garden, and try to freeze as much as possible.  Just ask my kids, they know first hand.   Since I have lots and lots of herbs, I looked around the internet to find out how to  preserve my summer harvest.  I ran across Kalyn's Kitchen and she explains how to freeze herbs wonderfully.

Kalyn mentions that if you're going to try freezing herbs, first it helps to understand the difference between soft herbs and hard herbs. A while ago Helen from Beyond Salmon wrote an excellent post on preserving and using herbs in which she explained this quite well. Basically soft herbs are things like basil, cilantro, parsley, oregano, and mint which are either eaten raw or added only for a few minutes of cooking. 

Hard herbs are things like rosemary, thyme, savory, and sage which are suitable for long cooking times. The two things from this list that I've had great luck freezing are rosemary and thyme. 

The frozen leaves fall off the stems and they were nearly as good as fresh. Try this if you have rosemary and thyme in your garden and live where there's a cold winter, and I think you'll like the result.

How to Freeze Fresh Herbs:  Rosemary and Thyme found on KalynsKitchen.com

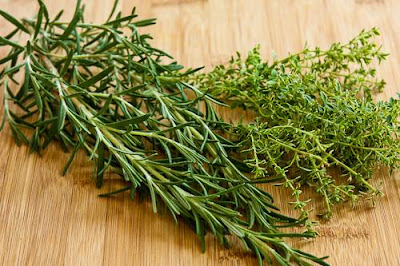
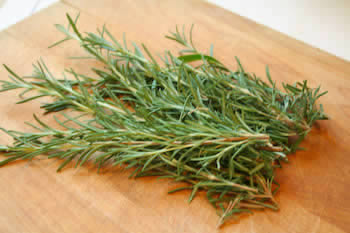
Cut some rosemary branches.


How to Freeze Fresh Herbs:  Rosemary and Thyme found on KalynsKitchen.com

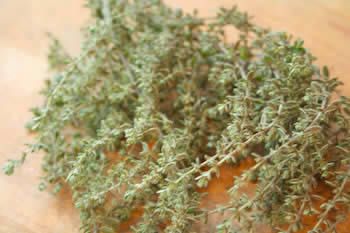
Cut some thyme branches. Herbs should be washed in cold water and either spun dry or blotted dry with paper towels.

How to Freeze Fresh Herbs:  Rosemary and Thyme found on KalynsKitchen.com

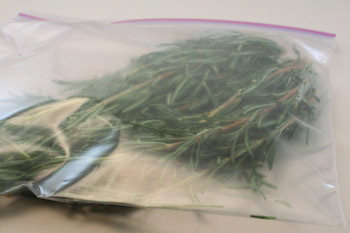
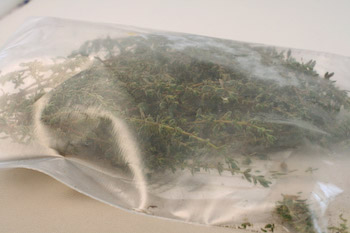
Put rosemary in small Ziploc bag.

How to Freeze Fresh Herbs:  Rosemary and Thyme found on KalynsKitchen.com

Use a separate Ziploc bag for the thyme. Let thyme and rosemary stay in the freezer for several weeks.

After a few weeks, take ziploc bag out of the freezer and use a rolling pin to roll over the bag containing the herbs. You should see a significant amount of leaves come loose from the stems. If some leaves don't come off, you can remove the loose leaves and freeze the others a bit longer, or pick the rest off by hand.

How to Freeze Fresh Herbs:  Rosemary and Thyme found on KalynsKitchen.com

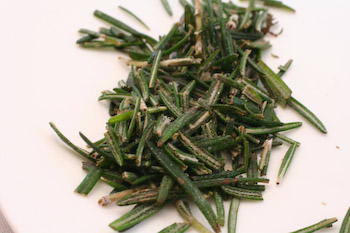
This rosemary has been frozen for nearly a year and is still green and very fragrant.

How to Freeze Fresh Herbs:  Rosemary and Thyme found on KalynsKitchen.com

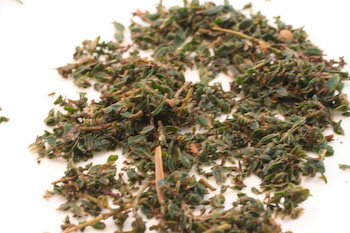
Thyme is a bit more fragile than rosemary, but this thyme is still great after nearly a year in the freezer.

How to Freeze Fresh Herbs:  Rosemary and Thyme found on KalynsKitchen.com

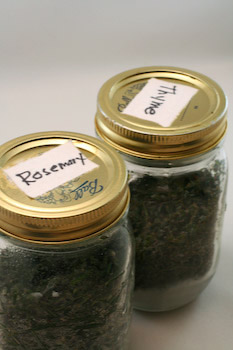
After I've separated the leaves from the stems, I like to store my frozen herbs in canning jars which have a lid that seals well. This keeps moisture away from the herbs. (The jars go back in the freezer.)

That's how easy it is to preserve the rosemary and thyme from your garden to use in wonderful soups and stews all winter long. Use the frozen leaves in any recipe calling for fresh rosemary or thyme. For recipes created using dried thyme or rosemary, use about twice as much of the frozen herbs as you would the dried version.

Source:  Kalyn's Kitchen