Find What You're Looking For:

Showing posts with label TIPS AND TRICKS. Show all posts

Wednesday, October 23, 2024

Epsom Salt For Your Garden

Epsom Salt for Your Garden

  • Epsom salt {hydrated magnesium sulfate} is renowned to many for its various home remedy applications but that is not all there is to this wonderful mineral. Unknown to many, Epsom salt has several benefits in organic gardening.
  • Its importance in Gardening have been one of nature’s best kept secrets and it’s has long been a favorite for many gardeners.
  • It helps grow sweeter, tastier vegetables, roses with more vibrant flower color.
  • It is also very useful in seed germination.
  • Epsom salts works best on soils that are slightly deficient in magnesium or high in calcium and potassium (soils found in western countries).

Improved Seed Germination

  • Epsom salt can be used at the Planting stage to aid seed germination. It acts as a soil amendment before seeding thereby giving your garden a powerful boost right from the start.
  • Apply 1 – 2 tablespoons into the soil per seed hole or use 1 cup of salt per 100 square feet of tilled soil for the best results.
Increased Nutrient Absorption
  • Applying Epsom salt to the soil helps facilitate the uptake of organic soil nutrients and the faster absorption of plant nutrients reducing to a minimal level if not eliminating the need for chemical fertilizers.

Beautiful, Bountiful Roses

  • Epsom salt due to the abundance of magnesium is plays a very important role in flower bloom formation. This is of significant importance to roses. Horticulturists will agree that application of Epsom salt helps roses to produce larger blossoms in greater numbers in flowers. Epsom salt also increases chlorophyll production meaning faster growth rate for roses.
Counter Transplant Shock
  • Epsom salt can also play a vital role in the transplants of nursery plants to the field. Epsom salt assists plants in adapting to their new environment and also help injured roots overcome transplanting shock.
  • Note that it is important that Plant roots does not come in contact with salt when adding a layer of salt around them..
Green Up Foliage
  • Magnesium plays an essential part in the production of foliage due its as in chlorophyll production. This is quite evident as plants suffering from this deficiency can be identified by their yellowing leaves. The application of Epsom salt around your plants helps lead to healthier foliage.

Prevent Leaf Curling

  • Application of a mixture of 2 tablespoons of Epsom salt in a gallon of water and apply directly to the leaves will help Prevent Leaf Curling caused by magnesium-deficiency in plants.

Deter Garden Pests

  • While Epsom salt is not as effective against pests as much as table salt (sodium chloride), it can still helps to deter pests. Epsom Salt crystals are sharp and when sprinkled around plants, they can scratch and irritate the bodies and feet of unwanted pests in much the same way as other preventives.

Grow Sweeter Fruit

  • It is a proven fact the most important stage in the life cycle of any plant is the production of fruits just after the flowering stage. Application of Epsom salt to the plant using the same methods and quantities stated above will lead to improved chlorophyll levels leading to increased energy which implies more sugar, thus allowing the plant to produce more yields of sweeter and healthier fruits.

Tastier Tomatoes

  • In a recent experiment, We observed that application of epsom salt to tomato vines really helps to balance the magnesium-deficiency so apparent to most tomato farmers.. It also lead to Tastier Tomatoes..
  • For tomatoes, the fruit to plant size ratio of tomato plant makes it susceptible to to calcium-deficiency (blossom end rot) but systematic application of epsom salts to our tomatoes worked perfectly and the positive result we got was healthy, tastier tomato fruits.
  • Our Findings revealed that tomato vines should have Epsom salt twice as often as other plants.  Application to tomato vines of dissolved Epsom salt – 2 tablespoons per gallon of water, every 2 weeks was the magic.. The most efficient application method for delivering magnesium to these plants is through foliage feeding method.

Conclusion

  • It is quite apparent that Epsom salt is a great addition to any organic Gardener and it’s almost impossible to use too much of it in your garden.
  • Epsom Salt is pH neutral, non harmful to the soil structure, it’s safe to apply and works fast to correct a variety of problems and increase the overall health of your garden.
  • Epsom salt also works quickly to prevent and correct a variety of problems and to improves the overall health of your garden. Epsom salt is also cheap and it’s certainly one of the best kept secret of the health-conscious, competent gardener. I hope with this post you have learnt several ways to add Epsom salt to your grower toolbox.

Wonderful Walnuts Explained

Wonderful Walnuts Explained...

Looking to boost your rate of burn? Look to raw walnuts to supercharge your metabolism and reduce inflammation. Inflammation can stall weight loss and leave you on a never-ending plateau.
While scientists are still working to isolate exactly which components in walnuts cause which good things to happen in your body, they’ve already established that this single food can have powerful effects on your health — due perhaps in part to their content of rare phytonutrients like tellimagrandin and morin. Here are some of the highlights.

5 ways walnuts boost health:

1. Walnuts are amazingly anti-inflammatory. Thanks to their omega-3 content and high levels of gamma tocopherol, a relatively rare form of vitamin E. Those omega-3 fatty acids — and probably other parts of the walnut, too — also help nourish your memory and thought processes.
2. They’re great for your entire cardiovascular system. Walnuts are known to improve your cholesterol levels, lower your C-reactive protein levels (an indicator of possible heart disease), boost the health of your blood vessels, and can also have positive effects on your blood pressure.
3. Walnuts help conquer belly fat. Not only does adding a reasonable amount of walnuts to your diet not cause weight gain, they can actually help you lose that hard-to-target belly fat.
4. Maybe diabetes, too. Great news for those with diabetes or metabolic syndrome: Walnuts can reduce your fasting insulin levels in a fairly short time.
5. Walnuts slow and prevent some cancers. Talk about a boost for both men and women. Walnuts can slow or prevent some breast cancers, plus prostate cancer, renal cancer, and colon cancer too. They also improve the markers of general prostate health.
Let’s not forget the nutrition! 
Walnuts are also packed with trace nutrients like copper and manganese, and the body-boosting minerals potassium, magnesium and calcium — although the actual mineral content varies quite a bit, depending on which walnut species you have.

Buying, storing and using walnuts:

You’ll find shelled walnuts in bulk bins or bagged on the shelf — but if you can get them whole and then shell them yourself (with a nutcracker), you have a better chance of getting more of the sometimes flaky, sometimes waxy inner skin, which contains the vast majority of the walnut’s health-enhancing phenols. Still, shelled or whole, walnuts are great for you.
As with all nuts, buy raw walnuts, which are quite easy to find.
If you’re buying whole walnuts, look for crack-free shells that feel heavy for their size. If you’re buying shelled walnuts, steer clear of anything that’s rubbery or wrinkled looking, or that bends instead of snapping cleanly if you try to break it.
Walnuts’ high healthy oil content means they actually can go bad, so do the sniff test before you buy; if they smell rancid, they’ll taste rancid too. Once you have your walnuts home, store them in the refrigerator for up to six months or the freezer for up to a year. Whole, unshelled walnuts can last for up to six months in a dry, cool pantry.

Yum! How to eat walnuts:

Walnuts are a great snack in their own right, especially during Phase 3 of the Fast Metabolism Diet. Or add chopped walnuts to oatmeal with berries and cinnamon, sprinkle them over a salad, or mix them into fruit salads. They’re especially great in fish dishes, with roasted beets, and in savory dishes like stuffing or wild rice.
There’s just one thing to watch out for with walnuts: They’re tree nuts, one of the most common food allergens out there. So if you think you might be sensitive or allergic to tree nuts, proceed with caution when it comes to walnuts — especially if you’re allergic to cashews or peanuts, which show some cross-reactivity with walnuts.
You might also want to give your doctor a heads-up about your walnut intake if you’re on medication for diabetes or if your blood glucose levels are being monitored since the walnuts can reduce your fasting insulin levels.

TIP: Buying and How to Store Avocados


Buying and How to Store Avocados

Picking out the perfect avocado can be challenging. Storing it to maximize its freshness is even more of a challenge. Hopefully these tips will help:

  • Look for avocados that have a uniform texture all over. If there’re soft spots, that means they’re bruised.
  • Don’t judge by the color of the fruit. Avocado’s come in several varieties and the color will be different based on the type.
  • Firmness tells it all. If an avocado is too firm to the touch, then it hasn’t ripen. If you’re going to need them several days in advance, these may be a good choice as they ripen well sitting on the counter. If they’re super soft, they’re either too ripe or will need to be used immediately. Gently putting pressure on the fruit is all that is needed, don’t squeeze them too hard.
  • If you have an avocado that has not ripened, don’t store it in the fridge. Chilling avocados halts the ripening process. Instead put it in a paper bag on the window sill and it will help it ripen quicker.
  • Once the avocado has reached the desired degree of ripeness you prefer, you can store leftovers in the fridge.
  • To optimize their freshness in the fridge, sprinkle with fresh lemon juice and place in a food saver storage bag, with all the air vacuumed out. They’re usually best when used within 3 days of slicing.
  • You can even freeze avocados. To do so, blend your avocados with a little lemon juice in a food processor, place in an airtight container in the freezer for up to a few months. Just know that the texture will change once they’ve been frozen.

Monday, July 4, 2016

How to Freeze Fresh Sage, Tarragon, and Mint

Fall may be approaching and you are looking at your abundance of herbs and wishing that you could have the freshness all winter long. Well, my friend, you can.


Tarragon

Sage

Mint

I used the same process for tarragon, mint, and sage, except I did use my garden scissors to cut the sage from the stems, which was easy to do. Since I'd learned that when freezing thyme and rosemary that the leaves of those herbs mostly fell off the stems when they were frozen, I decided not to spend the time stripping off the tarragon and mint leaves. For each of these herbs, I cut as much as I thought would fit into a large Ziploc bag and washed it well in my large salad spinner.

When they were spun dry, I put the herbs into the Ziploc bags. Then I left the bags open and let them sit on the counter for several hours, until the moisture left on the leaves had evaporated. If it's humid, allow a bit more time.

Then I sealed the bags, squeezing most of the air out, and put them in the freezer. Leave them for a few days or even weeks, depending on the type of herb.

After that time, the leaves will start to fall off the stems. This is a bowl of frozen tarragon after four days in the freezer, and you can see the bare stems where the leaves have fallen off. There were only a few stubborn leaves I had to pick off.

Not a very good photo because I took it at night, but here are the jars of frozen sage and tarragon leaves I ended up with. Each is slightly smaller than a mayonnaise jar, plenty of sage and tarragon for a lot of good dishes all winter long. Put the jars back in the freezer, then take out the frozen herbs as you need them. (The mint leaves are taking a bit longer to fall off the stems so I'm leaving them in the freezer a bit longer, but the frozen mint is also working out well.)

Source:  Kalyn's Kitchen

How to Freeze Fresh Rosemary and Thyme

How to Freeze Fresh Herbs:  Rosemary and Thyme found on KalynsKitchen.com

Did you know that many fresh herbs can be frozen in the summer when they're abundant and then used all through the winter? This post shares tips on how I freeze rosemary and thyme from my garden.


Even though it's still quite warm in MN, I am already anticipating fall approaching, and can feel the nights getting a bit cooler, and I know it's not that long until the garden goodness has to either be preserved or lost. I hate losing anything that comes from my garden, and try to freeze as much as possible.  Just ask my kids, they know first hand.   Since I have lots and lots of herbs, I looked around the internet to find out how to  preserve my summer harvest.  I ran across Kalyn's Kitchen and she explains how to freeze herbs wonderfully.

Kalyn mentions that if you're going to try freezing herbs, first it helps to understand the difference between soft herbs and hard herbs. A while ago Helen from Beyond Salmon wrote an excellent post on preserving and using herbs in which she explained this quite well. Basically soft herbs are things like basil, cilantro, parsley, oregano, and mint which are either eaten raw or added only for a few minutes of cooking. 

Hard herbs are things like rosemary, thyme, savory, and sage which are suitable for long cooking times. The two things from this list that I've had great luck freezing are rosemary and thyme. 

The frozen leaves fall off the stems and they were nearly as good as fresh. Try this if you have rosemary and thyme in your garden and live where there's a cold winter, and I think you'll like the result.

How to Freeze Fresh Herbs:  Rosemary and Thyme found on KalynsKitchen.com

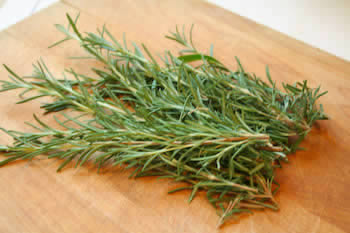
Cut some rosemary branches.


How to Freeze Fresh Herbs:  Rosemary and Thyme found on KalynsKitchen.com

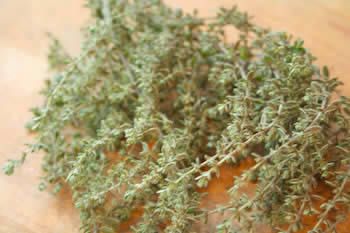
Cut some thyme branches. Herbs should be washed in cold water and either spun dry or blotted dry with paper towels.

How to Freeze Fresh Herbs:  Rosemary and Thyme found on KalynsKitchen.com

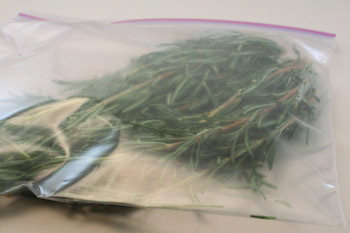
Put rosemary in small Ziploc bag.

How to Freeze Fresh Herbs:  Rosemary and Thyme found on KalynsKitchen.com

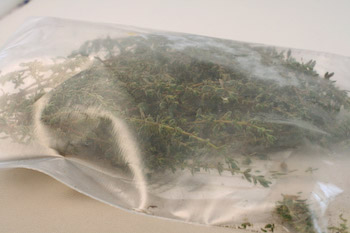
Use a separate Ziploc bag for the thyme. Let thyme and rosemary stay in the freezer for several weeks.

After a few weeks, take ziploc bag out of the freezer and use a rolling pin to roll over the bag containing the herbs. You should see a significant amount of leaves come loose from the stems. If some leaves don't come off, you can remove the loose leaves and freeze the others a bit longer, or pick the rest off by hand.

How to Freeze Fresh Herbs:  Rosemary and Thyme found on KalynsKitchen.com

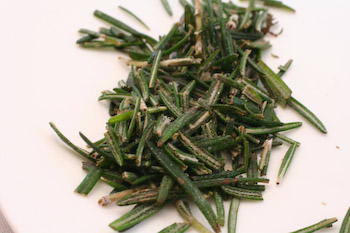
This rosemary has been frozen for nearly a year and is still green and very fragrant.

How to Freeze Fresh Herbs:  Rosemary and Thyme found on KalynsKitchen.com

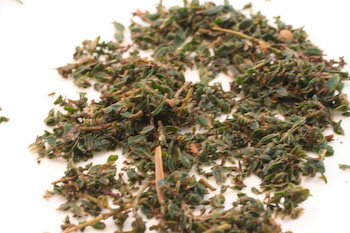
Thyme is a bit more fragile than rosemary, but this thyme is still great after nearly a year in the freezer.

How to Freeze Fresh Herbs:  Rosemary and Thyme found on KalynsKitchen.com

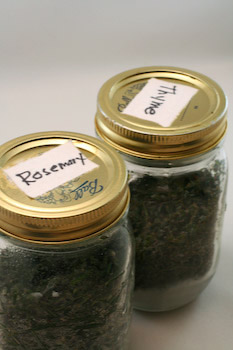
After I've separated the leaves from the stems, I like to store my frozen herbs in canning jars which have a lid that seals well. This keeps moisture away from the herbs. (The jars go back in the freezer.)

That's how easy it is to preserve the rosemary and thyme from your garden to use in wonderful soups and stews all winter long. Use the frozen leaves in any recipe calling for fresh rosemary or thyme. For recipes created using dried thyme or rosemary, use about twice as much of the frozen herbs as you would the dried version.

Source:  Kalyn's Kitchen

How to Preserve Fresh Basil on the Countertop

How to Preserve Fresh Basil found on KalynsKitchen.com

If you have a bunch of fresh basil and you'd like to keep it fresh a little longer, here's how to preserve fresh basil on the countertop! No kidding!


I love basil!  And if you have ever bought it in the grocery store, in that plastic container, you know what I am talking about.  Wilted, discolored leaves that leave you with sheer disappointment for $4.00.

I have heard that some people put a zip lock bag over their basil to create a "greenhouse" effect.  So...I tried it.  So...it failed.  The basil got moldy.  So...I am not doing that again.

I have been freezing fresh basil for many years and then started researching how to re-grow basil from cuttings.  And....voila!  I have turned 1 plant into 20 plants for the entire summer and will always have fresh basil on my countertop all year round.  Not to mention, any green on a countertop is more than welcome during our long, cold winters here in MN.

Recently I cut several buckets of basil and froze some, used some to make basil pesto, and kept out a generous handful of basil stalks for a little experiment. So, just how long do you think a jar of basil will stay good on the kitchen counter if you keep adding water?


Here's the basil jar the first day, and the basil is brightly green and fragrant.

Day 3, and there is no noticeable difference in the color or smell of the basil.


After three more days go by, some leaves are barely starting to curl, and the overall plant looks just the tiniest bit wilted.


Two more days, and the leaves are a little more curled, but still fragrant and perfectly usable.


Finally, 10 entire days and although one leaf has fallen off, the basil is really essentially as good as when I put it in the jar. I filled the water about every other day, and didn't allow myself to cut any leaves off so I could compare the photos. Of course, I doubt you'd ever keep a jar of fresh basil this long without snipping off most of the leaves to add to whatever you're cooking, but I thought it was great fun to see that it lasted this long.

So now nearly two weeks later, the basil is mostly still perfectly fresh and usable! Most of the stems have roots, and the basil is growing in the water.

And this, my friends, is how I reproduced my basil from 1 plant to 20.  I literally just put the rooted stems into garden soil and they took off. 

Happy Harvesting....You're welcome!   ;-)

How to Freeze Fresh Basil


How to Freeze Fresh Basil and Ideas for Using Frozen Basil  [found on KalynsKitchen.com]

Frozen basil is a wonderful thing to have in the freezer and this post shares all about How to Freeze Fresh Basil, something I've been doing for years!

 If you don't have enough basil to freeze, here's How to Preserve Fresh Basil on the Countertop.)


How to Freeze Fresh Basil and Ideas for Using Frozen Basil  [found on KalynsKitchen.com]
If you're a gardener who's growing basil, here are my step-by-step instructions on how you can freeze your basil to use all through the winter.  I do this several times each summer, whenever I have some basil that needs to be harvested. Here's how my basil looked before I trimmed the plants and pulled off the big leaves.

How to Freeze Fresh Basil and Ideas for Using Frozen Basil  [found on KalynsKitchen.com]

Here's my basil after I trimmed it. Basil will actually produce more leaves if it's vigorously trimmed a few times each year, since everywhere you cut the stem it produces two new stems. Just be sure to keep a few leaves on each stem (remember high school botany, that's where the plant gets food.)

How to Freeze Fresh Basil and Ideas for Using Frozen Basil  [found on KalynsKitchen.com]
I pinch off all the basil leaves, discard the stems, and wash the leaves very well in a salad spinner. Spin them as dry as you possibly can. If you don't have a salad spinner, just wash your basil leaves in the sink and dry them well with paper towels.

How to Freeze Fresh Basil and Ideas for Using Frozen Basil  [found on KalynsKitchen.com]
Put a few of handfuls of basil into the food processor, using the steel blade. The food processor bowl should be full, but not tightly packed.
How to Freeze Fresh Basil and Ideas for Using Frozen Basil  [found on KalynsKitchen.com]
I pulse the food processor with one hand and drizzle olive oil into the feed tube with the other hand, just pulsing until the basil is coarsely chopped. You should make sure that all the basil is coated with oil too, which keeps it from going dark in the freezer. 

I use about 2-3 tablespoons of olive oil for each batch in the food processor when I'm making coarsely chopped basil like this to use for pasta sauce, soup, or stew during the winter. 

When I'm making basil puree to add to basil vinaigrette I use more oil and chop the basil much more finely.

How to Freeze Fresh Basil and Ideas for Using Frozen Basil  [found on KalynsKitchen.com]
I have two sizes of these little plastic containers with tight lids that I use to freeze the basil. It doesn't matter what size container you use, but a good trick is to measure the containers before you first use them. That way, when you pull one out of the freezer for a recipe, you'll know how much it is.
Another way of freezing the chopped basil is in a quart-size plastic bag, smashing the basil down flat and pressing all the air out of the bag. This is easy to fit into a crowded freezer, and when it's time to use some basil you can just break off a piece and put the rest back into the freezer.

Source:  Kalyn's Kitchen

Monday, June 6, 2016

DIY: Orange Scented Cleaner


Soak orange peels in vinegar for two weeks in a sealed mason jar then pour the vinegar into a spray bottle. Use as a non-toxic and yummy smelling "green" cleaner.:

Soak orange peels in vinegar for two weeks in a sealed mason jar then pour the vinegar into a spray bottle. Use as a non-toxic and yummy smelling "green" cleaner.

My kids adore oranges.  But, what do you do with all those peels?  At first, I start freezing them to make my own orange peel zest.  Then I saw how to make my own orange scented vinegar cleaning spray.

Vinegar is my #1 cleaner.  It disinfects, reduces smells, mold, and removes calcium build-up. Here's a great site to browse for some great uses of vinegar: 1001 uses for vinegar.

But I honestly don’t love the smell.  Adding the orange peels to the vinegar is going to give it that wonderful citrus smell I love.

Talk about fresh smelling.  So, simple too.

Instructions:

Start to store your orange peels.  You can put in the freezer if  you like.  When you have enough, put them in a glass jar.  (Note, you add lemon peels too.)

Fill the jar up with White vinegar and let it sit for 2 weeks. 

After two weeks strain the liquid.  Discard the peels. 

Mix water with the vinegar in a ratio of 2:1.

Use and enjoy - Happy Cleaning!

How to Clean, Store and Keep Berries for Weeks


I saw this tip on making your strawberries last longer on the FoodNetwork show "The Kitchen".  I tried it and the bunch of strawberries and blueberries lasted for almost two WEEKS in the fridge after using this soak on them!  It is really easy, all you need are strawberries, vinegar and water!  

The natural vinegar kills the mold spores so your fruit will last longer WITHOUT changing the taste of your fruit!

*Note* this will work on any type of  berries.


These are strawberries that I have had in the glass container, covered, for over a week.  I bought a bunch because they are at their peak in season right now and I am sooooo glad that I found this trick to keep them fresh for daily eating!!


Perfect for topping steel cut oatmeal, some almond milk, sprinkled with granola and topped with berries and a little Stevia for some sweetness!  
Now that's a breakfast of champions!

Ingredients

  • Strawberries, Blueberries, Raspberries
  • 5 cups water
  • 1/2 cup vinegar

Instructions

Place berries in a colander over another bowl. Pour vinegar over the berries and then the water.  Or dump the berries in a big bowl with the vinegar and water and swirl around for a couple of minutes - then scoop out into a colander and rinse.  Reuse the water for other berries or a double batch of strawberries.

Let sit for 2 minutes while gently stirring around with your hands.

Drain and rinse under cold water.  Place berries on a sheet pan covered with paper towels and let dry.

Store in a glass container with a lid.