Find What You're Looking For:

Sunday, May 29, 2016

French Potato Salad

Ingredients

  • 1 pound small white boiling potatoes
  • 1 pound small red boiling potatoes
  • 2 tablespoons good dry white wine
  • 2 tablespoons chicken stock
  • 3 tablespoons Champagne vinegar
  • 1/2 teaspoon Dijon mustard
  • 2 teaspoons kosher salt
  • 3/4 teaspoon freshly ground black pepper
  • 7 tablespoons good olive oil
  • 1/4 cup minced scallions (white and green parts)
  • 1-2 tablespoons minced fresh dill
  • 2 tablespoons minced flat-leaf parsley
  • 2 tablespoons julienned fresh basil leaves
  • 2 tablespoons minced tarragon

Nikki's Notes:

  • Make sure to use small potatoes.  Once, I used larger yukon potatoes since they didn't have small ones and cut them up and the salad was mushy - lessons learned!
  • Make sure to not over cook them, they should still have a slight firmness to them.  The texture of the salad will be much better.  
  • I found that it is best to make it then serve it that same day.  If made the day before, the dressing really absorbs into the salad and you will need to add more before serving.  
  • I boiled my potatoes the morning of the day that I was serving it, placed them in a bowl to cool and reach room temperature, then cut them, added the wine and stock. Then about an hour before serving, I added the dressing and herbs, tossed and covered with plastic wrap until serving.  
  • Best to serve at room temperature.
  • Everyone loved this version of a potato salad!  With all of the fresh herbs, it doesn't feel heavy like the yellow mayo potato salad.


Instructions

Drop the white and red potatoes into a large pot of boiling salted water and cook for 20 to 30 minutes, until they are just cooked through. Drain in a colander and place a towel over the potatoes to allow them to steam for 10 more minutes. As soon as you can handle them, cut in 1/2 (quarters if the potatoes are larger) and place in a medium bowl. Toss gently with the wine and chicken stock. Allow the liquids to soak into the warm potatoes before proceeding.

Combine the vinegar, mustard, 1/2 teaspoon salt, and 1/4 teaspoon pepper and slowly whisk in the olive oil to make an emulsion. Add the vinaigrette to the potatoes. Add the scallions, dill, parsley, basil, 1 1/2 teaspoons salt, and 1/2 teaspoon pepper and toss. Serve warm or at room temperature.

Source:  Ina Garten, FoodNetwork

Saturday, May 28, 2016

Garlic White Bean Basil Hummus + Homemade Toasted Pita Chips


A delicious, fresh tasting appetizer that will please any crowd.

Nikki's Notes:

  • This is a garlicky dip, so if you don't like a lot of garlic (I even cut the original garlic ingredients in half, you will want to add 1 clove and adjust to your taste buds. As the dip sits, the more the garlic flavor come through too.
  • In a pinch, I bought Stacy's sea salt pita chips in the deli section and they were perfect.
  • For gluten free, just serve with corn tortillas or vegetables.
  • This is definitely a go-to dip and will be making many times over.  Everyone was asking for the recipe and it keeps very well in the fridge for left overs. 
  • Makes a great spread on sandwiches too! 

Ingredients

  • 3 (6-8 inch) whole wheat pitas
  • 1 tablespoon of olive oil, or olive oil cooking spray
  • 1 teaspoon salt
  • 1 (15 ounce) can of cannellini beans, drained and rinsed
  • 2 cloves of garlic
  • 2 tablespoons fresh lemon juice
  • 1/2 teaspoon salt
  • 1/2 teaspoon freshly ground black pepper
  • 4-6 large basil leaves
  • 3 tablespoons olive oil, plus extra for drizzling on top

Instructions

Preheat oven to 375 degrees F.

Cut each pita into 8 wedges. and place wedges in a large bowl. Drizzle with 1 tablespoon of olive oil or spray with olive oil cooking spray and gently toss to coat. Sprinkle 1 teaspoon salt all over wedges adding other spices if desired; toss again to coat.

Arrange on an ungreased baking sheet and bake about 8-10 minutes, until pita chips are golden brown. Flip over once halfway through baking. Cool on pans.

Meanwhile to make your hummus: combine beans, garlic, lemon juice, basil, salt and pepper in the bowl of a food processor. Pulse a couple of times until the mixture looks somewhat chopped. Add in the 3 tablespoons of olive oil while the machine is still running. Let process until the mixture is creamy.

If the mixture appears to be too thick, add in a teaspoon of water at a time to thin it out. Otherwise, season with additional salt and pepper to your liking and drizzle the top with a tiny bit of olive oil. Dip away!

Notes

The hummus should be stored in the refrigerator and can be made 1 day ahead. The pita chips should be kept at room temperature in a container.

Source:  Ambitious Kitchen


Friday, May 27, 2016

BBQ Ribs Without A Grill (Slow Cooker)

Whether you have a grill or don't, this is our fail-proof method for fall-off-the-bone tender ribs every time. It's simple, delicious, and just what you need for summer. 

Serves 4-5

Ingredients 
  • 1.5-3 lbs. pork ribs (baby back or loin back ribs)
  • ½-1 bottle your favorite bbq sauce*
  • optional (but recommended): 2-4 Tbsp your favorite rub (we like Bone Suckin' Dry Rub)
Instructions 

Remove the silver skin on the back side of the ribs using a sharp knife. (The first layer is the most important.)

If using a dry rub, pat ribs dry and coat with dry rub. Let rest at room temperature 1 hour or in the refrigerator for up to a day (recommended).

Slice into manageable sections (we did 3-4 ribs per section) and place in a slow cooker. Cook on LOW 7-8 hours or HIGH 3-4 hours.

Preheat broiler. Place ribs on a baking sheet coated with foil. Brush generously with barbecue sauce. Broil in the oven 5-7 minutes, or until sauce is bubbly and a bit thickened.

If desired, you can brush them with more sauce and put them in for another few minutes

Notes on the Recipe:

  • PREP RIGHT. Before cooking the ribs, you’ll need to remove the silver skin on the underside. This video is a great visual for that, but I have written instructions above.
  • BEAT THE HEAT. I actually put my slow cooker on my back patio. It doesn’t heat up my kitchen, and saves me counter space for all the other things going on in my kitchen. It’s the best.
  • FOR A GREAT FINISH. You can absolutely pop these on the grill for a few minutes instead of under the broiler.
  • GETTING SAUCY. A really good gluten free and dairy free barbecue sauce is "Bone Suckin' Sauce" (which uses molasses and honey as sweetener). We get it at Lowe’s (of all places!) or at Amazon. though we also really like Stubb’s Sweet and Smoky. Neither brand uses corn syrup and the ingredients are all recognizable.
Source:  One Lovely Life

Honey Sweetened Berry Lemonade

Serves: 5-6 cups

Ingredients
  • 1 cup fresh or frozen strawberries
  • 1 cup fresh or frozen blueberries
  • ½-3/4 cup fresh lemon juice
  • 4-6 Tbsp honey
  • 3-4 cups water
  • 3-4 sprigs fresh mint or basil
Instructions
In a blender, pulse together berries, lemon juice, honey, and water just a few times to break up the berries. (You can also use an immersion blender in a pitcher)

Taste and add additional honey or lemon juice as desired. Stir in the fresh herbs. Serve over ice!

Source:  

Pumpkin Bars with Dark Chocolate and Coconut


Scrumptious low carb pumpkin bars made with almond butter instead of flour. These delicious grain-free, gluten-free and dairy free bars will blow your mind.

Scrumptious low carb pumpkin bars made with almond butter instead of flour. These delicious grain-free, gluten-free and dairy free bars will blow your mind.

Makes about 16 squares

Ingredients

  • 1/2 cup natural almond butter
  • 1/2 cup pumpkin puree
  • 1/4 cup pure maple syrup
  • 1 egg
  • 1 teaspoon vanilla extract
  • 1/2 teaspoon baking soda
  • pinch of salt (only if using unsalted almond butter)
  • 1 teaspoon cinnamon
  • 1/8 teaspoon ginger
  • 1/8 teaspoon nutmeg
  • pinch of cloves
  • 1/2 cup unsweetened coconut flakes, divided
  • 3 oz your favorite dark chocolate bar (at least 70% cocoa), coarsely chopped

Instructions

Preheat oven to 350 degrees F. Spray an 8x8 inch baking pan with nonstick cooking spray.

In a large bowl, whisk together all ingredients except coconut and dark chocolate. Once ingredients are well combined, fold in 1/4 cup of the coconut flakes and all of the dark chocolate.

Pour into prepared pan and sprinkle the rest of the coconut flakes on top. Bake for 20 minutes or until slightly golden brown on the edges. Place pan on wire rack to cool. Once cool, cut into 16 squares. Enjoy!

Source:  Ambitious Kitchen

Thursday, May 26, 2016

Chia, Quinoa & Banana Granola Bars

These granola bars are packed with banana, dried fruit, quinoa, oats and chia seeds. They're a great on the go breakfast or fuel up snack! Gluten free too.

These granola bars are packed with banana, dried fruit, quinoa, oats and chia seeds. They're a great on the go breakfast or fuel up snack! Gluten free too.

Ingredients

  • 1 cup gluten free rolled oats
  • 1/2 cup uncooked pre-rinsed quinoa
  • 2 tablespoons chia seeds
  • 1/4 teaspoon salt
  • 1 teaspoon cinnamon
  • 2 ripe bananas, mashed (about 3/4 cup)
  • 1/2 teaspoon vanilla extract
  • 1/4 cup roughly chopped almonds
  • 1/4 cup chopped pecans
  • 1/3 cup dried fruit (raisins or cranberries work well)
  • 1/4 cup natural creamy almond butter
  • 2 tablespoons honey or pure maple syrup

Instructions

Preheat oven to 350 degrees F. Line an 8x8 inch baking pan with parchment paper to prevent bars from sticking.

In a large bowl, combine oats, uncooked quinoa, chia seeds, salt and cinnamon. Stir in mashed banana and vanilla. Fold in almonds, pecans (or walnuts) and dried fruit.

Place a small saucepan over low heat; add in almond butter and honey (or maple syrup) and stir until warm and almond butter is melted. Fold into granola bar mixture until well combined. Pour into prepared pan and press down firmly with hands or with a measuring cup to help bars stay intact. Bake for 25 minutes or until edges turn golden brown. Allow to cool completely before cutting into 10 bars. I cut mine into 8 originally and they were much too filling for a snack, so I reduced the serving size to 10.

Notes:
Feel free to mix and match dried fruits and/or nuts as you see fit.

These bars can be stored at room temperature for a few days, but are best kept tightly wrapped in the fridge or freezer.

Source:  Ambitious Kitchen

Homemade Vanilla Cinnamon Raisin Almond Butter


Delicious and healthy homemade cinnamon raisin almond butter with a hint of vanilla. Spread it on bananas, apples, toast... or just eat it by the spoonful!

Ingredients


  • 16 oz raw almonds (about 3 1/4 cups)
  • 1/4 teaspoon vanilla
  • 1 teaspoon cinnamon
  • 1/4 teaspoon salt, plus more to taste
  • 1/2 cup raisins
  • optional: 1-2 teaspoons coconut oil, if necessary
Instructions
Preheat oven to 350 degrees F. On large baking sheet spread out almonds and roast in oven for 10-12 minutes until slightly brown. Be very careful not to burn the nuts! Cool for 10 minutes.

Transfer almonds to the bowl of a food processor and process for 10-15 minutes, scraping down the sides as necessary (about every 2 minutes). At this point the almonds should start to clump together. Continue to process until you reach the desired consistency. I always process until my almond butter is liquid like. If after 20-25 minutes the almond butter is not creamy add in a teaspoon or two of coconut oil. You can also do this if you want super creamy almond butter!

Next add in vanilla, cinnamon and salt. Process again for 30 seconds. Taste and add more salt if necessary.

Next add in raisins and pulse a few times to break up the raisins a bit.

Transfer to plastic container or mason jar and store at room temperature or in fridge. If you store at room temp, simply give the almond butter a stir before you use it.

Some Tips:
Finally, I want to leave you with some tips for making your own almond butter because it’s not always easy (but it’s always delicious):

1. Have patience. Even if you don’t think it will come together, give yourself a little more time and wait it out. It takes me about 20 minutes and I have a pretty strong food processor. Keep scraping the nuts down the side of the food processor every minute or two.

2. Roast your almonds! Roasting almonds adds a nice sweetness and great nutty flavor.

3. Not creamy enough for you? Try adding a teaspoon or two of coconut oil.

4. Want a little crunch? Once your finished processing, stir in 1/4 cup of finely chopped roasted almonds.

5. Add in a touch of spice! Vanilla beans, a little splash of vanilla extract, cinnamon, ginger, nutmeg or cardamom goes a long way in adding flavor to the almond butter.

Source:  Ambitious Kitchen

Incredible Peanut Butter Quinoa Granola Bars

Almost no-bake quinoa granola bars with simple, natural ingredients. Only require a few ingredients and so easy to make! FREEZER FRIENDLY!

Almost no-bake quinoa granola bars with simple, natural ingredients. Only require a few ingredients and so easy to make!

My pantry is stocked with Ancient Harvest quinoa because I use it at least three times a week. This time, I wanted to do something a little different and unique: quinoa IN granola bars. And yes, it’s uncooked — or rather, toasted in the oven with the oats. Therefore you get crunchiness and chewiness, something that most granola bars out there lack.

Ingredients

  • 1 cup gluten free rolled oats
  • 1/2 cup uncooked Ancient Harvest quinoa
  • 1/2 cup creamy all natural peanut butter (or your favorite natural nut butter)
  • 1/8 teaspoon salt
  • 1/4 cup honey
  • 1 teaspoon vanilla extract
  • 1 tablespoon coconut oil
  • 1 tablespoon chia seeds
  • Optional: 1/4 cup dark chocolate chips or dried fruit

Instructions

Preheat oven to 350 degrees F. Add oats and quinoa to a large baking sheet and spread around evenly. Once oven is preheated, toast the oats and quinoa for 10 minutes. Once done toasting, pour oats and quinoa into a medium bowl and stir in chia seeds.

While quinoa and oats are toasting, make the peanut butter mixture by adding peanut butter, sea salt, honey, vanilla and coconut oil in medium saucepan over low heat. Stir every so often until the mixture is smooth and creamy. Remove from heat and allow to cool for a few minutes, then add to the bowl with the oats, quinoa and chia. Stir well to incorporate. If adding chocolate chips, wait a few minutes before stirring in, otherwise they will melt. Another option is to melt the chocolate chips and drizzle them over the top of bars.

Line an 8x4 or 9x5 inch loaf pan with parchment paper; pour mixture in and spread out evenly, then press mixture down in the pan. Place in freezer for 10-20 minutes or until mixture has hardened. Remove bars from pan and cut into 8 bars. Store bars in the freezer or fridge. Enjoy!

Source:  Ambitious Kitchen

Superfood Coconut Oil Granola with Chia & Flax

Crunchy coconut oil granola made with oats, pecans, almonds, honey, chia & flax. Perfect for snacking or an on-the-go breakfast.

Healthy coconut oil granola naturally sweetened with honey. Delicious nutrition from chia, flax, pecans & almonds. Make a batch and enjoy it throughout the week!

Makes 10 servings. about 1/2 cup, 278 calories

Ingredients

  • 2 cups rolled oats (gluten free, if desired)
  • 1/4 cup oat flour
  • 2 tablespoons flaxseed meal
  • 2 tablespoons chia seeds
  • 3/4 cup raw almonds
  • 3/4 cup raw pecans
  • 2 teaspoons cinnamon
  • 1/4 teaspoon nutmeg
  • pinch of cloves
  • 1/4 teaspoon sea salt
  • 1/4 cup coconut oil
  • 1/3 cup honey
  • 1 teaspoon vanilla extract
  • Optional: 3/4 cup dried cranberries or cherries

Crunchy coconut oil granola made with oats, pecans, almonds, honey, chia & flax. Perfect for snacking or an on-the-go breakfast.

Instructions

Preheat oven to 300 degrees F. Line a large baking sheet with parchment paper.
In a large bowl, whisk together oats, oat flour, flaxseed meal, chia seeds, almonds, pecans, cinnamon, nutmeg, cloves and salt.

Add coconut oil, honey and vanilla extract to a small saucepan and place over low heat, stirring frequently until coconut oil is completely melted. Pour over dry ingredients and mix well until oats are completely coated. Sometimes I find it necessary to use my hands.

Next spread the granola evenly in the baking pan and bake for 20 minutes. After 20 minutes stir granola and add dried fruit, if you are using. Return granola to the oven and bake 15-20 minutes longer or until granola is slightly golden brown. Remove from the oven and allow the granola to cool completely on the baking sheet so that little clumps stay intact. Once cooled, transfer to an airtight container. 

Best used within 7-10 days. 

Source:  Ambitious Kitchen

Tuesday, May 24, 2016

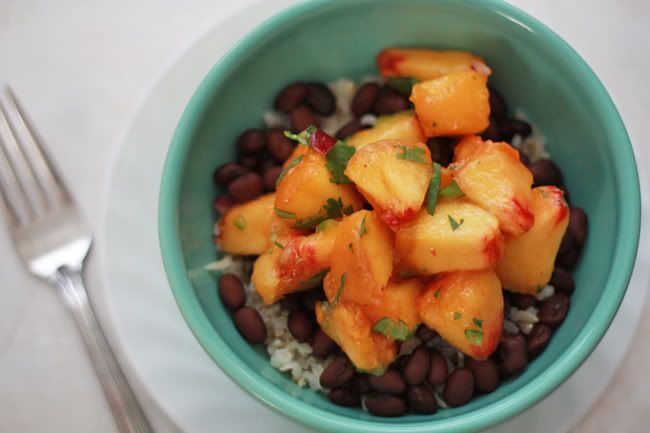
Peach Salsa Rice Bowls


Peach Salsa Rice Bowls I One Lovely Life
Ingredients

For the rice bowls:

  • 4 cups cooked rice (I prefer brown) or quinoa
  • 2 (14.5oz) cans black beans, drained and rinsed
  • 1 recipe peach salsa (recipe follows)

For peach salsa:

  • 4-5 large peaches, skins removed* and diced
  • 3 Tbsp red onion, finely minced
  • 3 Tbsp cilantro, finely minced
  • ½ jalapeno, ribs and seeds removed and finely minced
  • juice of 1 lime
  • pinch salt and pepper
Peach Salsa Rice Bowls I One Lovely Life


Instructions

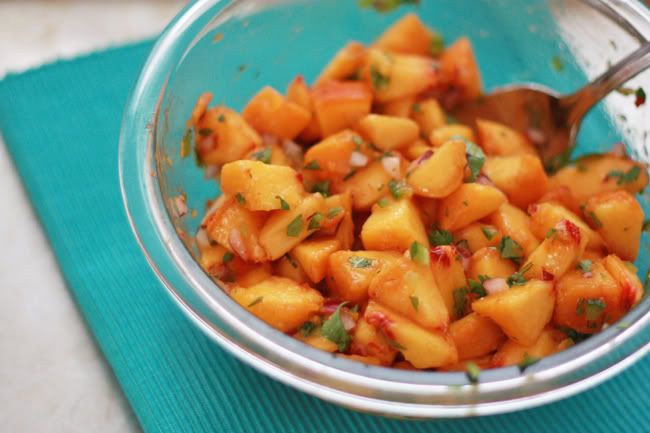
Assemble peach salsa by tossing peaches, onion, cilantro, jalapeno, lime juice, salt and pepper together in a large bowl.

Assemble individual rice bowls by layering together rice, black beans, and peach salsa as desired.

NOTES

 *To remove peach skins easily, bring a large pot of water to a rolling boil. Add peaches for 45-60 seconds. Remove from boiling water and place in a large bowl of cold water. The skins should come off easily.

Source:  One Lovely Life

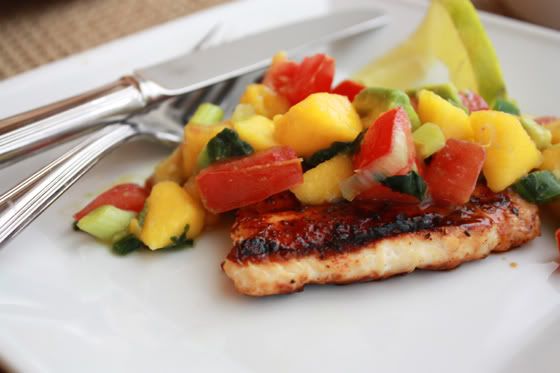
Spice-Rubbed Chicken with Tropical Salsa

Spice Rubbed Chicken & Tropical Salsa I One Lovely Life

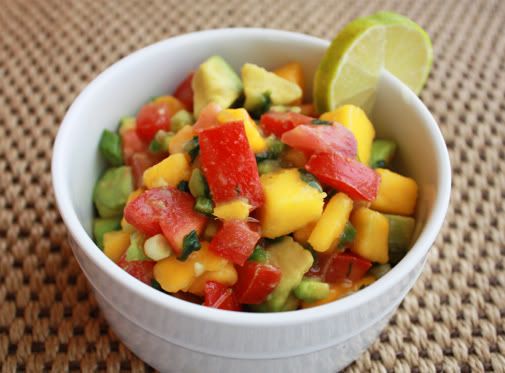
The salsa is most definitely the star of the show here. The chicken spice-rub is here so that you have more vehicles for the salsa, truth be told. It’s fabulous with this spice-rubbed chicken, but it’s also fantastic on tortilla chips and can certainly be served with chips as an appetizer.

One tip for grilling/cooking the chicken: I like to pound the chicken out between plastic wrap so that it’s roughly even in thickness. This helps grilling go faster and helps you keep the chicken from drying out.

Serve with coconut rice if you wish.

Serves: about 6

Ingredients:

For the chicken:

  • 1½ lbs chicken breasts, pounded to ¾" thickness
  • ¼ c sugar
  • scant Tbsp salt
  • ½ tsp chili powder
  • 1½ tsp paprika
  • ⅛ tsp garlic powder
  • ⅛ tsp onion powder
  • ⅛ tsp dry mustard

For the salsa:

  • 5 Roma tomatoes, diced
  • 2 mangoes, diced
  • 1 avocado, diced
  • juice of 2 limes
  • ¼c cilantro
  • 4 scallions, diced
  • 1 tsp vinegar
  • pinch salt and pepper
  • 1 jalapeno, diced (with seeds and ribs removed)
Spice Rubbed Chicken & Tropical Salsa I One Lovely Life


Instructions:

For chicken:
In a bowl, combine sugar, salt, and all spices. Rub mixture onto both sides of chicken breasts. Allow to rest 30 minutes to absorb flavors. Grill or pan-fry till done. Chicken will develop a crust from the rub. Don't panic. It's delicious. Let chicken rest 1-2 minutes to allow juices to redistribute, then serve warm with salsa.

For salsa:
Combine all ingredients and toss to combine. Chill until ready to serve.

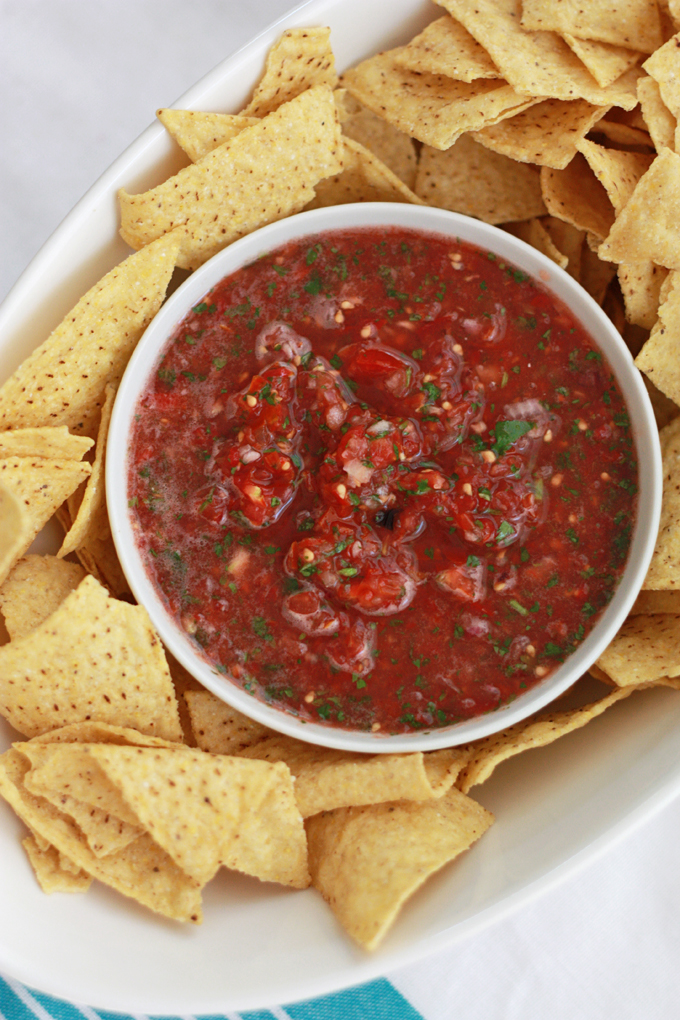
Our Favorite Salsa

Our Favorite Fresh Salsa // One Lovely Life

OUR FAVORITE FRESH SALSA


This is a fresh, mild salsa, and we usually skip anything spicy when making it. You can certainly add in a bit of jalapeño or green chile for some kick, if you like!

Serves: 1½ - 2 cups

Ingredients

  • 2 cups fresh tomatoes, halved or quartered
  • 3-4 Tbsp diced onion (I usually use red)
  • ¼ cup cilantro
  • juice of 1 lime
  • salt, to taste

Optional:

  • 1 Tbsp minced garlic
  • 1 Tbsp minced Jalapeno
  • 1 tsp olive oil

Instructions:

Place all ingredients in a food processor or blender. Pulse a few times until you've reached your desired texture. Add salt, to taste.

If you like more of a pico salsa, chop all of the ingredients instead of blending.

Serve on anything!

Source:  Adapted from One Lovely Life

Pineapple Guacamole

What could make guacamole better? Pineapple. That's what.

Guacamole is one of those make-it-by-taste sorts of things for me. That’s why the amounts here are flexible. Taste and adjust as you see fit. Seem too bland? Add a little onion or jalapeno. Feeding little ones or the spice-averse? Leave them out! 

See? Flexible.

Not sure what to do with pineapple guacamole? Spread it on a sandwich, dollop it on a taco or quesadilla, scoop it onto a burger, or use it for chip dip.

We made pineapple tostadas with toasted corn tortillas, layering refried beans, grated cheese, shredded lettuce, minced tomatoes, diced pineapple, mango-pineapple salsa, and a big-time dollop of guacamole.

Heaven.

It’s the second best way to eat pineapple guacamole. The first is with a spoon when no one’s looking.

Ingredients

  • 3 avocados, removed from peels and pits removed
  • ½c fresh pineapple, finely minced
  • juice of 1 lime
  • ¼c cilantro, minced
  • salt and pepper, to taste
  • optional: 1-2 Tbsp finely minced or grated onion, ½-1 jalapeno, minced

Instructions

In a medium bowl, mash avocados with pineapple, lime juice, cilantro, as well as any onion or jalapeno you're using, until you've reached your desired consistency. (If you want a smoother consistency, feel free to puree the mixture in a blender or food processor).

Add salt and pepper to taste.

This pineapple guacamole is such a perfect party dip.A tropical twist on your old favorite.

Source:  One Lovely Life

Kentucky Derby Hot Brown Sandwiches


Kentucky Hot Brown I One Lovely Life

The Kentucky Hot Brown, as I understand it, originated at the Brown Derby restaurant as a late night snack for guests to eat after a long night of dancing. The kentucky hot brown is an open-faced sandwich topped with shaved turkey or chicken, sliced tomatoes, and mornay sauce that’s put under the broiler until bubbly and browned then topped with an “x’ of bacon slices and garnished with parsley.

This is the sort of sandwich that becomes a knife and fork affair. 


Traditionally, the bacon is served as pictured, in an “x” over the sandwich. If you’re serving this to little ones or want it a bit easier to eat, I recommend crumbling it and sprinkling it on top of the mornay sauce after broiling. It’s for ease of eating that I diced my tomatoes instead of slicing them. You do what you will.

Serves: 4

Ingredients:

For sandwich:

  • 4 slices thick toast
  • 1lb turkey or chicken, cooked and sliced thin
  • 8 slices bacon cooked (crumbled if desired)
  • 8 slices tomatoes (or 2 small roma tomatoes, diced)
  • Mornay sauce (see below)
  • fresh parmesan and fresh parsley for garnish

For Mornay sauce:

  • 4 Tbsp butter
  • 4 Tbsp flour
  • 1½c half-and-half
  • ¾c grated parmesan or Romano cheese
  • salt and pepper to taste
Kentucky Hot Brown I One Lovely LifeKentucky Hot Brown I One Lovely Life

Instructions:

For the mornay sauce:
In a medium saucepan, melt butter over medium heat. Stir in flour and cook 1-2 minutes, or until slightly golden. Stir in half-and-half and stir until sauce has thickened somewhat. Stir in grated cheese and add salt and pepper, to taste.

For the sandwiches:
Preheat the broiler. Line a baking sheet with foil. Place toast on baking sheet and divide the turkey (or chicken) among the toast and layer tomatoes on top of the turkey. Pour mornay sauce the top of each sandwich.

Place pan under the broiler for 2-3 minutes, or until mornay sauce is golden and bubbly.

Place bacon in an "x" over each sandwich and garnish with parmesan and parsley.

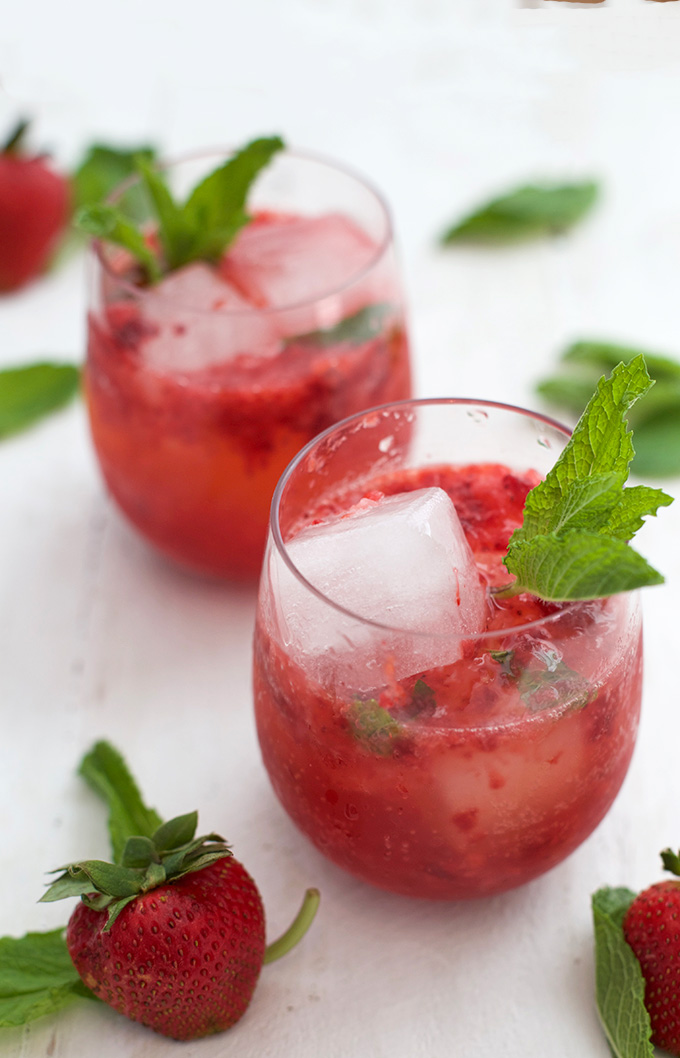
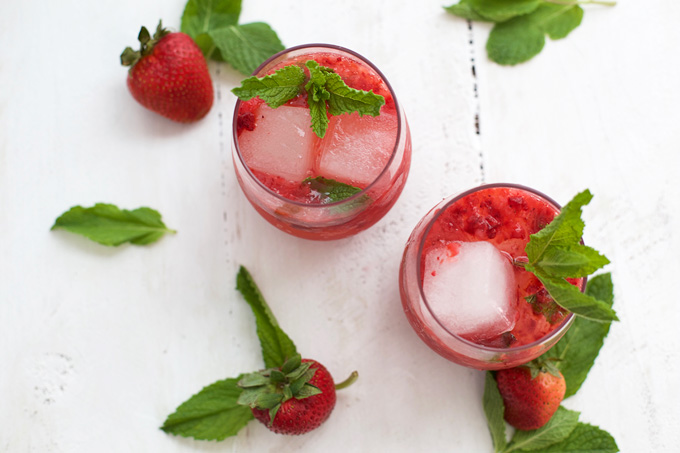
Non-Alcoholic: Strawberry Juleps - Virgin

Virgin Strawberry Mint Juleps - Perfect for Derby day, summer barbecues, and pool days.

Serves: 2 large drinks

Ingredients

  • 1 heaping cup strawberries (frozen or fresh)
  • 6-8 oz ginger ale
  • 6-8 oz sparkling water (I love La Croix flavored sparkling water)
  • 4-5 fresh mint leaves, plus more for garnish
  • ice, to taste

Instructions

In a blender, pulse together the strawberries and ginger ale just a few times to break up the strawberries. (If you've got texture issues, you could totally puree until smooth. I just love the texture.)

Pour in the sparkling water and mash the mint leaves into the pitcher or the cups to bruise the mint a bit (this will help it release its flavor).

Add ice to taste and drink immediately!


Need something fresh and bright for derby day? Try these virgin Strawberry Mint Juleps!

Monday, May 23, 2016

Gluten Free Banana Muffins

The perfect gluten free banana muffin. It's light, fluffy, and uses natural sweetener!

The texture on these babies is PERFECT. They’re light and fluffy, unlike so many of the gluten free muffins out there. I really appreciate that they’re naturally sweetened, and the little extra goodness from the oats makes my heart happy.

(You can hand-mix these if you prefer. Just puree the bananas beforehand)

Serves: 12 standard muffins or 24 mini muffins.

Ingredients

  • 3 ripe bananas, sliced
  • ⅓ cup coconut oil, avocado oil, butter, or ghee
  • ⅓ cup pure maple syrup
  • ¼ cup milk (I use almond or coconut milk)
  • 2 eggs
  • 1 tsp vanilla extract
  • ½ tsp cinnamon
  • 1 tsp baking soda
  • ½ tsp salt
  • ½ cup old-fashioned or quick-cooking oats (we use Bob's Red Mill gluten free oats)
  • 1¾ cup gluten free baking mix (we use Bob's Red Mill 1-to-1 gluten free baking flour)

To top:

  • a few extra oats (optional)
These Gluten Free Banana Muffins are so good! They're also naturally sweetened and have the BEST texture!

Instructions

Preheat oven to 350 degrees.

In a food processor or stand mixer, combine bananas, oil/butter, syrup, milk, eggs, and vanilla until smooth. Add cinnamon, baking soda, salt, oats, and flour. Pulse until just combined.

Scoop into muffin cups (if not using a silicone pan, you'll want to grease or line the cups first). If desired, top with a sprinkle of oats.

Bake at 350 degrees for 20-25 minutes, or until cooked through. Let cool and serve!

Source:  One Lovely Life, adapted from Cookie+Kate

Spring Chicken Salad


A savory + refreshing chicken salad that features a marriage of crisp, tart and sweet flavors.

Yield: 2 servings
Prep Time: 10 min

Ingredients

  • 2 C. Spring Mix Salad
  • 1 Cooked Chicken Breast, Cubed
  • ¼ C. Dried Cranberries
  • 1 Large Granny Smith Apple, Cored and Cubed
  • 1 TBSP. Mayonnaise
  • Black Pepper
  • Sea Salt
c10177ec869169d5029e5a08cd5db31be7cf5a95

Instructions

Start with a bed of greens, add apple, diced chicken, cranberries and mayonnaise.
Sprinkle with black pepper and sea salt to taste. ​

Mix well. Serve with brown rice crackers or over additional mixed greens.

This salad is cool and refreshing and serves 2. The cranberries offer a welcome sweetness while the tart apple and spring greens lend a nice crunch.

Source:  Today Show Cooking

Sunday, May 8, 2016

Roasted Asparagus with Hollandaise


Yield:  8 Servings

Ingredients

  • 12 tablespoons unsalted butter (1 1/2 sticks)
  • 4 extra-large egg yolks, at room temperature
  • 3 tablespoons freshly squeezed lemon juice
  • Kosher salt and freshly ground black pepper
  • 2 pinches of cayenne pepper
  • 2 pounds fresh asparagus
  • Good olive oil

Instructions

Preheat the oven to 400 degrees.

For the Hollandaise Sauce:
Melt the butter in a small sauce pan. Place the egg yolks, lemon juice, 1 1/2 teaspoons salt, 3/4 teaspoon pepper and cayenne in the jar of a blender. Blend for 15 seconds. With the blender running, slowly pour the hot butter into the blender and blend for 30 seconds, until the sauce is thick. (You can leave it in the blender at room temperature for up to 1 hour. If it is made in advance, add 1 tablespoon hot tap water and blend for a few seconds before serving.)


For the Asparagus:
Break off the tough ends of the asparagus and, if they're thick, peel them. Place the asparagus on a baking sheet, drizzle with olive oil, then toss to coat the asparagus completely. Spread the asparagus in a single layer and sprinkle liberally with salt and pepper. Roast the asparagus for 15 to 20 minutes, until tender but still crisp.

Pour the hollandaise sauce over the warm asparagus and serve.

Source:  Ina Garten, FoodNetwork
Monday, May 2, 2016

Crab, Avocado, & Tomato Salad w/ Lemon-Basil Dressing


Serves 2 | Prep time: 15 minutes | Total time: 15 minutes

Ingredients

  • 2 teaspoons grated lemon zest
  • 3 1/2 tablespoons fresh lemon juice, divided
  • 2 teaspoons extra virgin olive oil
  • 1/4 teaspoon Dijon mustard
  • 1/8 teaspoon sea salt
  • Pinch of freshly ground black pepper
  • 1 avocado, diced
  • 1/4 cup basil leaves, thinly sliced
  • 1/4 cup chopped red bell pepper
  • 2 tablespoons finely chopped red onion
  • 12 ounces lump crabmeat, shell pieces removed
  • 4 (1/4-inch-thick) slices ripe beefsteak tomato
  • 1 cup cherry tomatoes, halved


Ingredients

Combine the lemon zest, 2 tablespoons lemon juice, and the next four ingredients (through black pepper) in a large bowl, stirring well with a whisk. Reserve 2 teaspoons of the juice mixture. Add the remaining 1 1/2 tablespoons lemon juice, avocado, and the next four ingredients (through crab) to the remaining juice mixture; toss gently to coat.

Arrange two tomato slices and 1/2 cup of cherry tomatoes on each of two plates. Drizzle about 1 teaspoon of the reserved juice mixture over each serving. Divide the crab mixture evenly between the two plates and serve.

Sunday, May 1, 2016

How to Freeze Avocados


I’m here to make your day, because this post is all about freezing avocados so that you can enjoy delicious California Avocado guacamole, avocado toast, avocado hummus and more all year round!

Freezing avocados is really easy to do, and I’m going to show you two different ways to freeze avocados today so that you can enjoy your favorite Avocado recipes all year round!

The first method for freezing avocados involves freezing the avocado halves.

How to Freeze Half Avocados

Slice the avocado in half, peel and seed. Brush the avocado halves with a bit of lemon juice and wrap them tightly in a clingy plastic wrap**. Don’t leave any room for air – this means the plastic wrap should cling into the curve where the seed was.

Place the plastic wrapped avocado halves into a large freezer safe zip tight bag. Once you have all your wrapped avocados in the freezer safe bag, press out all the air, zip it closed, and place the avocado halves in the freezer.
Remove each one whenever you’re ready to use it, let it thaw, and enjoy!

How to Freeze Mashed Avocados

If you’re one of those people who prefers to have the avocados frozen already mashed for quick spreading onto toast or for making guacamole; this method is for you.

Place your scooped avocados into a bowl and drizzle with the juice of half a lemon.

Mash the avocados to your preferred texture – I like mine chunky.

Place in a zip tight freezer safe bag, remove the air and you’re done! (seal the bag almost all of the way, then put in a straw to suck out the remaining air - who needs a foodsaver?!)  I do this will all of my frozen food.

Bonus tip: You can divide the bag into sections for freezing easy portions, but I use a whole gallon size bag each time so I just lay it flat, fold it in half and place it in the freezer.

Another Online Tip: 
Buy salsa at Sam's and their avocados on the same day, let the avocados ripen, then mash them, add some of the salsa, a spritz or two of lime from the grocery shelves (not fresh, tho you can!), and a bit of salt, then spoon it into one of those freezer bags that suck out the air, and seal, date, and toss into the freezer. To thaw, take it out of the freezer and let it thaw in the refrigerator for 24 hours, and serve! 

Also, freeze half an avocado, without the stone, the same way, with the air sucked out of the bag. Just before removing the air, spritz the flesh with lime (or lemon). Works like a charm when you want to have avocado slices rather than mashed. Let thaw without opening. A cold avocado holds well when you want to use one of those avocado slicers!

Source: The California Avocado