Find What You're Looking For:

Showing posts with label VEGAN. Show all posts

Wednesday, September 28, 2016

Flourless Black Bean Avocado Brownies


Healthy Flourless Black Bean Avocado Brownies

Say whaaat? Don't roll your eyes or make that "eww that sounds so gross" facial expression!  Honestly, you will be surprised at how delicious these are!

Healthy vegan avocado brownies made with black beans instead of flour, and avocado instead of butter or oil! You’re going to love these fudgy chocolate-packed vegan and gluten free treats.

INGREDIENTS

  • 1 large flax egg or 1 egg
  • 1 - 15oz can low sodium black beans, rinsed and drained
  • 1/2 medium to large ripe avocado
  • 1 tablespoon vanilla extract
  • 1/2 cup packed dark brown sugar*
  • 2/3 cup unsweetened cocoa powder
  • 1 teaspoon coconut oil
  • 1/4 teaspoon baking soda
  • 1/4 teaspoon baking powder
  • 1/3 cup vegan chocolate chips, plus 2 tablespoons for sprinkling


INSTRUCTIONS

Preheat oven to 350 degrees F. Grease a 8×8 inch baking pan (I use coconut oil spray) .

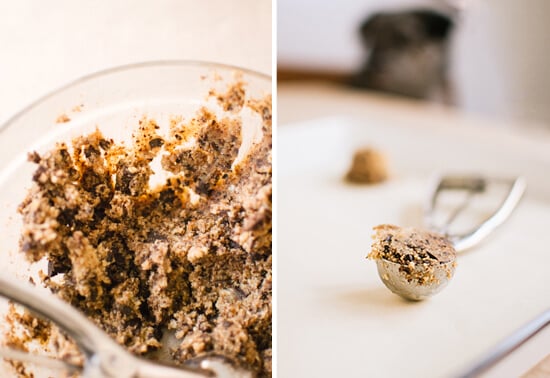
Place egg, black bean, avocado, vanilla, and brown sugar and process in a food processor until smooth. Add in cocoa powder, coconut oil, baking soda, and baking powder and process again until smooth. 


Note:  Batter will be thick. If batter is way too thick and won't process, you can add in a tablespoon or two of almond milk. This batter needs to be very thick in order to produce fudgy brownies.
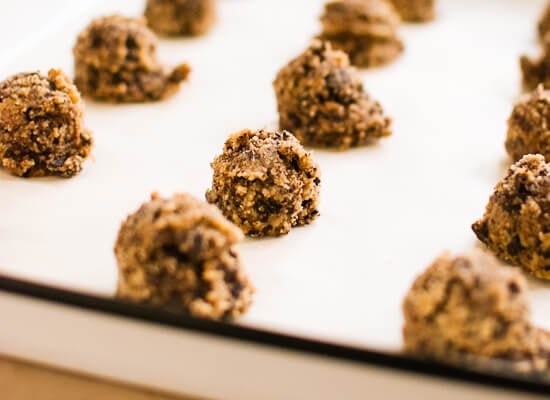
Fold in chocolate chip or sprinkle onto batter then transfer to prepared pan and use a spatula to spread evenly to sides. Sprinkle top of batter with 2 tablespoons of remaining chocolate chips.

Bake for 22-30 minutes or until knife inserted in center comes out somewhat clean. We don't want these to dry out, but we also don't want them completely raw either! The top of the batter should be completely set and no longer jiggle. Cool pan completely on wire rack then cut into 12 bars.

NOTES
*You may be able to sub the brown sugar for honey, agave or maple syrup. I would reduce to 1/3 cup though.

The brownies are best went made in a food processor so that beans can blend together better.

Serve either at room temperature or cold. They should be stored in the fridge in an air tight container.


You can also freeze these and thaw out for an easy treat. I would wrap each one in parchment paper then put in a large gallon zip lock so you can take 1 out a time if you wanted.  They don't take long to thaw out.

Source:  Ambitious Kitchen

Saturday, September 24, 2016

Gluten-Free Chocolate Chip Cookies

Gluten-free Chocolate Chip Cookies Recipe

These cookies have a lot going for them. For starters, they are absolutely delicious and everything that a chocolate chip cookie should be: chewy around the edges, soft in the middle, and full of rich chocolate and caramel-like flavors.

chocolate chip cookie doughcookie doughNaturally Sweetened, Gluten-free Chocolate Chip Cookies Recipe

As you can see here, my last batch puffed up quite a bit in the middle. My other batches spread out more during baking like traditional Tollhouse cookies. The cookies seem to spread out the most when you plop the just-mixed dough onto the baking sheet and bake right away. They spread out a little less if you give the coconut flour a few minutes to soak up some extra moisture, and they spread out the least if you let the dough chill in the refrigerator for ten or more minutes before baking.


Naturally sweetened, gluten-free chocolate chip cookies made with almond meal and coconut flour. These cookies remind me of classic Tollhouse cookies, but much more healthy and easy to make—only one bowl required! Since this recipe is egg free, it is easily made vegan by substituting coconut oil for butter and using maple syrup instead of honey.

Yields 24 small cookies.

Ingredients
  • ¾ cup almond flour or almond meal, very firmly packed (about 3 ounces or 100 grams)
  • ¼ cup coconut flour, very firmly packed (about 1½ ounces or 43 grams)
  • 1 teaspoon baking soda
  • ½ teaspoon fine grain sea salt
  • Dash cinnamon (optional)
  • ½ cup butter or coconut oil, melted
  • ½ cup real maple syrup (preferably grade B) or honey
  • 1 teaspoon vanilla extract
  • 6 ounces dark chocolate, chopped, or 1 cup chocolate chips
Instructions
Preheat oven to 350 degrees Fahrenheit and line a cookie sheet with parchment paper or use a silicone mat.
In a medium bowl, whisk together the flours, baking soda, salt and cinnamon. Pour in the melted butter (or melted coconut oil), maple syrup (or honey) and vanilla extract, and mix thoroughly. Stir in the chocolate.

Let the dough rest for 5 minutes in the refrigerator so the coconut flour can absorb some of the excess moisture (or let the dough chill in the fridge for 10+ minutes if you want fat cookies, like those shown here). Scoop dough, one tablespoon at a time, in mounds onto the baking sheet, leaving a couple inches around each cookie.

Bake for about 11 minutes, until golden brown. Let them cool on the baking sheet for a few minutes, then slide the parchment paper onto a cooling rack to finish cooling. The cookies will be fragile when they are warm but will firm up as they cool.
Notes


These cookies are gluten free, thanks to a simple combination of two flours (almond and coconut flours). They’re naturally sweetened with maple syrup, which lends a brown sugar-like sweetness. They’re eggless, too, which means that the recipe is easily vegan. These cookies are about as healthy as cookies can be.


The original recipe calls for almond flour, but you can use almond meal from Trader Joe’s and they will turn out great.  Most stores now carry coconut flour in their baking section.  Bob's Red Mill is very popular and priced pretty good.  You can always check out Amazon.com too.  Coconut flour is essential to this recipe because its high fiber content soaks up the extra moisture from the liquid sweetener, ensuring that the cookies don’t spread out too much on the pan (more on that later).

The cookies taste fantastic whether you use maple syrup or honey, but I think maple syrup tastes more like brown sugar and yields a more traditionally flavored cookie. I also tried using coconut oil instead of butter, which, as you might expect, produced a cookie with a more pronounced coconut flavor. I’m partial to the butter version. I’m not quite sure why, but the coconut oil cookies were thinner and seemed ever-so-slightly brittle the next day. Lastly, I chose to chop up dark chocolate instead of using chocolate chips, so maybe I shouldn’t call these chocolate chip cookies after all. Whether you choose chips or chunks or chop your own chocolate, just make sure it’s good quality.


Make it dairy free/vegan: Just use the coconut oil instead of the butter (to make it dairy free) and choose maple syrup as your natural sweetener instead of the honey (to make it vegan).


Source:  Cookie and Kate, Recipe adapted from Gluten Free Fix. 

Friday, July 22, 2016

Healthy Seven Layer Dip

This 7 layer dip recipe features layers of freshly prepared "refried" black beans, guacamole, salsa and pico de gallo! cookieandkate.com

This healthy Tex-Mex layer dip is made with fresh ingredients! Homemade "refried" black beans, guacamole, salsa verde, pico de gallo and more. It's vegan and dairy-free, too. Recipe yields enough dip for 4 to 8 people, depending on serving sizes.

Serves: 6

Ingredients

Refried black beans

  • 2 teaspoons extra-virgin olive oil
  • ¼ cup finely chopped yellow or white onion (about ¼ medium onion)
  • 1 clove garlic, pressed or minced
  • 1 teaspoon ground cumin
  • 1 can (15 ounces) black beans, rinsed and drained, or 1½ cups cooked black beans
  • ¼ cup water
  • ¼ teaspoon salt
  • Freshly ground black pepper, to taste

Quick guacamole

  • 2 medium avocados, halved and pitted
  • 1 tablespoon lime juice (about ½ medium lime)
  • ¼ teaspoon salt

Pico de gallo

  • 1 large or 2 medium tomatoes, chopped (about 1½ cups chopped)
  • ¼ cup finely chopped yellow or white onion
  • ¼ cup chopped fresh cilantro
  • 1 tablespoon lime juice (about ½ medium lime)
  • ¼ teaspoon salt

Remaining layers

  • ½ cup salsa verde, homemade or jarred, or your favorite salsa
  • Handful of chopped pickled jalapeƱos (optional, if you like spice)

Instructions

To cook the black beans: In a small saucepan over medium heat, warm the olive oil until shimmering. Add the onions and a few dashes of salt. Cook, stirring occasionally, until the onions have softened and are turning translucent, about 3 to 6 minutes.

Add the garlic and cumin. Cook, stirring constantly, until fragrant, about 30 seconds. Pour in the drained beans and water. Stir, cover and cook for 5 minutes. Reduce the heat to low, then remove the lid and use a potato masher or the back of a fork to mash up about at least half of the beans. Continue to cook the beans, uncovered, stirring often, for 3 more minutes.

Remove the pot from the heat and stir in the salt and pepper. Taste, and add more salt and/or pepper if necessary. If the beans seem dry, add a very small splash of water and stir to combine. Spread the beans into an even layer in a shallow, medium-sized serving bowl.

To prepare the guacamole: Use a spoon to scoop the flesh of the avocado into a small mixing bowl. Add the lime juice and salt. Mash with a clean potato masher or fork until the mixture is blended and no longer chunky. Taste and add additional lime juice and/or salt, if necessary. Spread the guacamole on top of the beans, leaving the outer ½" of beans visible for presentation value.

To avoid watering down your dip, drain the salsa in a fine mesh colander, or use a fork to transfers the solids onto the guacamole, again leaving the outer ½" of the guacamole visible.

To prepare the pico de gallo: In a medium bowl, combine the tomatoes, onion, cilantro, lime juice and salt. Stir to combine, then use a fork to pile the pico on top of the salsa, leaving behind as much of the juices as possible. Top with a sprinkle of chopped pickled jalapeƱo, if using.

NOTES
Recipe created with reference to All Recipes.

STORAGE SUGGESTIONS: This dip is really best consumed soon after preparing, but I enjoyed leftovers the next day. Press plastic wrap against the surface to help prevent the guacamole from browning.

MAKE IT QUICKLY: Substitute about 1½ cups each store-bought refried black beans and guacamole. 

Source:  COOKIE AND KATE

Wednesday, July 20, 2016

JalapeƱo Lemon Herb Pesto


Ingredients

  • 1 cup lightly packed fresh parsley
  • 1 cup lightly packed fresh cilantro or basil
  • 1 to 2 medium jalapeƱos, roughly chopped (remove seeds and membranes for less heat), optional
  • 1 medium lemon, juiced
  • 1 medium garlic clove, roughly chopped
  • ½ teaspoon salt
  • ½ cup pepitas (green pumpkin seeds) or slivered almonds
  • ½ cup olive oil
  • Freshly ground black pepper, to taste


Instructions

Toast the pepitas in a small skillet over medium heat, stirring frequently, until they are making little popping noises and turning lightly golden on the edges. Set aside to cool a bit.

To make the pesto, combine the herbs, jalapeƱo, lemon, garlic and salt in a food processor. Pour in the pepitas. Pulse a few times and then run the machine while drizzling in the olive oil until the mixture is well blended, scraping down the bowl as necessary.

Source:  Cookie and Kate

Summertime Pasta Salad with Tomatoes, Corn and JalapeƱo Pesto

Healthy summertime pasta salad! cookieandkate.com

Serves: 8 cups

This healthy pasta salad features bold summer flavors, including tomatoes, corn and black beans tossed in spicy, fresh pesto! It's a great vegetarian side dish for potlucks and barbecues. 

This recipe keeps well for several days in the refrigerator, covered. Leftovers are great served warm or chilled. If you want to change it up/stretch it out, add some fresh, leafy greens and a drizzle of lemony dressing.

Ingredients

Pasta salad

  • ½ pound whole grain bow-tie pasta or rotini or penne
  • 1 (14-ounce) can black beans, rinsed and drained
  • 1 pint cherry tomatoes (10 ounces), sliced into thin rounds
  • 1 ear fresh corn, shucked (about ½ cup fresh corn kernels)
  • ½ to ¾ cup crumbled feta or diced avocado


JalapeƱo herb pesto

  • 1 cup lightly packed fresh parsley
  • 1 cup lightly packed fresh cilantro or basil
  • 1 to 2 medium jalapeƱos, roughly chopped (remove seeds and membranes for less heat), optional
  • 1 medium lemon, juiced
  • 1 medium garlic clove, roughly chopped
  • ½ teaspoon salt
  • ½ cup pepitas (green pumpkin seeds) or slivered almonds
  • ½ cup olive oil
  • Freshly ground black pepper, to taste

pasta salad ingredients

Instructions
Bring a large pot of salted water to boil. Cook the pasta until al dente, according to package directions. Before draining, reserve about a cup of cooking water. Drain and return to pot. Set aside.

Toast the pepitas in a small skillet over medium heat, stirring frequently, until they are making little popping noises and turning lightly golden on the edges. Set aside to cool a bit.

To make the pesto, combine the herbs, jalapeƱo, lemon, garlic and salt in a food processor. Pour in the pepitas. Pulse a few times and then run the machine while drizzling in the olive oil until the mixture is well blended, scraping down the bowl as necessary.

Pour enough pesto into the pasta to lightly coat it once tossed (you might not quite need all of it). Add a small splash of pasta cooking water and toss well. 

Transfer the pasta to a large serving bowl and add the drained black beans, sliced cherry tomatoes, fresh corn and feta or avocado. Stir until combined. This salad tastes best after it's had a chance to marinate for about 30 minutes, but you can serve it right away if need be.

Notes
MAKE IT VEGAN/DAIRY FREE: Omit the cheese and use diced avocado instead.
MAKE IT GLUTEN FREE: Use gluten-free pasta. 
MAKE IT NUT FREE: Be sure to use pepitas, which are seeds, rather than nuts
VARIATIONS:  If you’re sensitive to spice or find the idea of jalapeƱo in pesto to be downright strange (I think it’s lovely), you can skip it altogether. For less spice, be sure to remove all the membranes and seeds from the jalapeƱo. You might also taste the jalapeƱo beforehand to make sure you haven’t gotten an overpoweringly spicy pepper on your hands.

Feel free to change up the herbs in the pesto, too. I’m crazy for cilantro but basil would be great, too (or just double the parsley for parsley pesto). If you find the pesto to be too strongly flavored for you, try letting it rest for 30 minutes or mixing in some Parmesan to temper the flavor a notch.
I love the salty, creamy feta in this recipe, but for a dairy free/vegan version, replace it with avocado. You might need to add a bit more salt, to taste. Sun-dried tomatoes are a great add-in, if you have some. I like the dehydrated kind from Trader Joe’s, which are somehow still pliable enough to eat right out of the bag.
Source: Cookie and Kate

Friday, July 15, 2016

Pumpkin Tiramisu


My contribution to the grand Thanksgiving dinner menu!

May I present: Vegan, grain free and gluten free Pumpkin Tiramisu, sweetened with maple syrup and topped with delicious coconut whipped cream!


Serves: 4

Ingredients
  • 2 cups raw cashews
  • 1 can full fat coconut milk, refrigerated over night
  • 4 tablespoon maple syrup, divided
  • 1 teaspoon vanilla extract, divided
  • ½ cup fresh squeezed lemon juice
  • ⅓ cup + 2 tablespoon coconut oil, melted
  • 16 oz pumpkin puree
  • ¼ teaspoon ground ginger
  • ½ teaspoon cinnamon
  • pinch of nutmeg
  • 4-6 large cookies of your choice (or these cookies are great in it too)
  • Raw cacao powder, for dusting
Instructions
Soak cashew nuts in water for at least 2 hours.

Carefully remove the can of coconut milk from the fridge - do not shake! Scoop out the coconut cream that has accumulated at the top of the can into a medium bowl. Discard remaining coconut liquid or save for use in a different recipe.

Add 1 tablespoon of maple syrup and ½ teaspoon vanilla extract to the coconut cream and whip with a hand mixer. It may take several minutes for the cream to stiffen so be patient! Store in the refrigerator.

Drain and rinse cashews and combine with lemon juice, 3 tablespoon maple syrup, ½ teaspoon vanilla extract and coconut oil in a food processor. Blend on high speed until smooth; it may take several minutes to achieve a non-gritty texture.

Drop about 1 - 1.5 tablespoon of the cashew cream into your dessert glasses so the bottom is covered. Now add the pumpkin puree to the remaining cashew mixture in your food processor together with the ginger, cinnamon and nutmeg and blend until smooth. Taste for sweetness; add more sweetener if needed.

To assemble the tiramisu, crumble cookies between your fingers and divide evenly between your dessert glasses, then top with pumpkin-cashew cream and 1-2 tablespoon of coconut whipped cream. 

Dust with cacao powder and refrigerate for at least 3hours before serving. Enjoy!

Notes
Your dessert glasses should hold at least 10 fl oz which would fill them to the rim. If you plan to cover the glasses, you may need bigger containers.

If you do not have time to soak the cashews, you may have to add extra liquid to the cashew cream mixture; about 1-2 tablespoon of filtered water or coconut milk.

These can last up to 3 days in the refrigerator.

Source: Rose | The Clean Dish

Tuesday, May 24, 2016

Peach Salsa Rice Bowls


Peach Salsa Rice Bowls I One Lovely Life
Ingredients

For the rice bowls:

  • 4 cups cooked rice (I prefer brown) or quinoa
  • 2 (14.5oz) cans black beans, drained and rinsed
  • 1 recipe peach salsa (recipe follows)

For peach salsa:

  • 4-5 large peaches, skins removed* and diced
  • 3 Tbsp red onion, finely minced
  • 3 Tbsp cilantro, finely minced
  • ½ jalapeno, ribs and seeds removed and finely minced
  • juice of 1 lime
  • pinch salt and pepper
Peach Salsa Rice Bowls I One Lovely Life


Instructions

Assemble peach salsa by tossing peaches, onion, cilantro, jalapeno, lime juice, salt and pepper together in a large bowl.

Assemble individual rice bowls by layering together rice, black beans, and peach salsa as desired.

NOTES

 *To remove peach skins easily, bring a large pot of water to a rolling boil. Add peaches for 45-60 seconds. Remove from boiling water and place in a large bowl of cold water. The skins should come off easily.

Source:  One Lovely Life

Friday, April 1, 2016

Slow Cooker Bean and No Bacon Soup

Simple Slow Cooker Vegetable Bean Soup. So easy and delicious! (Vegan & Gluten Free)

This is one of my husband's favorite canned soup. Nothing against canned soup in a pinch (well, actually, I have a lot of things against canned soup - mainly sodium).  Whenever possible, make homemade and freeze in quart sized bags to have them all winter long.  

Why did I named this soup "Bean and No Bacon" soup? I named it that way so it would be easily identified when looking through recipes - you thought of the soup in the red and white can didn't you?   If I called it Vegetable Bean, I would envision a totally different soup. Come to think of it, the canned soup doesn't have any bacon in it either...I digress...

Another favorite white bean would work well here too. The soaking step speeds up the cooking process, but if you forget, don't fret. As for the vegetables, mince them very very small, and they'll just melt as they cook. Delicious!

Serves: 6-8

INGREDIENTS

  • 1 lb. dried great northern beans, soaked overnight if possible and drained
  • 3 carrots, very finely minced
  • 2 stalks celery, very finely minced
  • 1 onion, very finely minced
  • 2-3 cloves garlic, minced
  • ½ tsp sage (I buy rubbed sage rather than ground, but ground works)
  • 4 cups vegetable broth (chicken broth works fine too or to get the bacon taste, use ham broth)
  • 2 cups water
  • salt and pepper to taste
Slow Cooker Vegetable Bean Soup from www.onelovelylife.com

INSTRUCTIONS

Drain beans (if soaked overnight) and place beans, carrots, celery, onion, garlic, and sage in the slow cooker. Cover with broth and water. Cover and cook on high for about 8 hours (the beans will be tender after 3-4 hours if you've soaked them beforehand, but the longer it cooks, the creamier the soup gets).

Taste soup and add salt and pepper to taste

Source: Adapted from One Lovely Life

Tuesday, March 29, 2016

Fresh Quinoa, Pomegranates and Kale Salad

Isn't this salad beautiful? My favorite combination–pistachios, pomegranate, kale, and dressing. I love the combination of flavors and textures here –
velvety, crunchy, sweet, tangy, salty… 

A fantastic reset salad - great for starting fresh!

As always, feel free to change things to your liking–toasted almonds are delish, and you could always go for baby spinach over baby kale. Can’t find pomegranates? Diced up apples or pears, or even dried cherries or cranberries would be nice.

INGREDIENTS

For the Citrus Dressing:

  • Juice and zest of 2 lemons
  • 3 Tbsp orange juice
  • ⅓ cup olive oil
  • ¼ tsp salt and pepper
For the Salad:
  • 1 cup quinoa, uncooked
  • 1-1½ cup baby kale (more, if desired)
  • ⅔ cup pomegranate arils (more or less, to taste)
  • ½ cup salted pistachios

INSTRUCTIONS

For the Dressing:
Whisk ingredients together in a small bowl. Taste and add additional honey, salt, or pepper as desired.

For the Salad:
Cook quinoa according to package directions (or see here for my easy method). Allow to cool. When quinoa has cooled, stir in baby kale, pomegranate seeds, and toss with dressing to coat. Sprinkle pistachios over salad and serve.

NOTES
If you're not eating it all at once, you can combine the quinoa, dressing, and pomegranate beforehand and store the nuts and kale separately for optimal texture. Then, combine before serving. If you want to pack it for lunch, you can combine everything but the pistachios in the morning and then just sprinkle them on top right before you eat it.

Source: One Lovely Life

Monday, March 28, 2016

Mexican Stuffed Peppers with Quinoa & Black Beans

Mexican Stuffed Peppers with Quinoa & Black Beans // One Lovely Life

If you’re new to quinoa, this is a great way to try it. These were SO full of flavor and were absolutely delicious. I loved the quinoa stuffing mixture –quinoa, black beans, green chiles, cilantro, and more.

The cheese was more of a garnish than a necessity, so you could easily leave it off if you’re eating dairy-free or vegan. I also highly recommend making your own enchilada sauce. It’s completely delicious and just the right amount of spicy.


Serves: 8

INGREDIENTS
  • 4 bell peppers (any color), sliced in half stem-to-tip, seeds removed
  • 1c quinoa, uncooked
  • ½ medium onion, diced
  • 1 (15oz) can black beans, drained and rinsed
  • 1 roma tomato, seeded and diced
  • 1 (4oz) can diced green chiles (don't drain)
  • ¼c cilantro, minced
  • ¼tsp salt
  • ¼tsp pepper
  • olive oil, if desired
  • ½c Monterrey Jack, grated*
  • ½c cheddar cheese, grated*
  • 1 recipe red enchilada sauce (or 1 (28oz) can)*
Mexican Stuffed Peppers with Quinoa & Black Beans // One Lovely Life

INSTRUCTIONS

Add quinoa and onion to a large saucepan with 2 cups of water and a pinch of salt. Bring to a boil over medium-high heat. Boil 5 minutes, cover, turn off heat and let steam 15 minutes. Fluff with a fork.

In the meantime, microwave pepper halves 2-3 minutes to soften slightly. (Prepared this way, the peppers should come out crisp-tender. If you want them crisper, you can omit this step.)
Pour quinoa/onion mixture into a mixing bowl. Stir in black beans, tomato, green chiles and their juices, cilantro, ¼ tsp salt, and ¼ tsp pepper. If the mixture seems to dry, drizzle in a bit of olive oil (I didn't need any).

Pour enchilada sauce into a 9x13" baking dish. Divide filling among peppers. Nestle stuffed peppers into the enchilada sauce. Sprinkle with cheeses.


Cover the pan with foil and bake at 375 degrees 25-30 minutes. Remove foil and cook about 5 minutes longer. Serve peppers drizzled with enchilada sauce.

Source: One Lovely Life


Sunday, March 27, 2016

Coconut Lime Popsicles

Lime in the Coconut Popsicle // One Lovely Life

These coconut lime popsicles are creamy, dreamy, and delicious. We use full-fat coconut milk (loaded with healthy fats), lime juice, and honey to make these awesome popsicles. The flavor develops as they freeze, so if you taste the smoothie mixture and it seems a bit flat, just wait. The lime will diffuse throughout the coconut milk and the end result is delicious. Not overly sweet, but really delicious and creamy just the same.

A FEW NOTES ON THE RECIPE:

  • Any popsicle mold will work for this recipe, but this popsicle mold is the one I used for the photos. It has a lid that holds the popsicle sticks in place, and that’s been really handy for us. If you don’t have a popsicle mold, you can pour the mixture into paper cups, freeze for 30-45 minutes, then poke the popsicle sticks into each cup and continue freezing till solid.
  • You can control the amount of lime that goes into the recipe. I tend to like things pretty lime-y, but if you want the coconut to come through, you’ll want to stick with one lime.
  • Also, note that sometimes the lime zest will settle at the bottom of the popsicle mold, which means the first bite of popsicle might be a bit lime zest-heavy. This hasn’t bothered me or my kids, but I’ve found that really blend-blend-blending the mixture before pouring it into the popsicle molds does the trick in preventing this problem.
Serves: 2 cups (about 6-7 popsicles)


INGREDIENTS

For extra lime-y popsicles, go for the zest and juice of 2 limes. For more coconutty popsicles, stick with 1 lime. For somewhere in between, use the zest of 1 and juice of 2. You're in control!

  • 1 (13oz) can full-fat coconut milk
  • zest and juice of 1-2 limes
  • 3-4 Tbsp honey


INSTRUCTIONS

Combine all ingredients in a blender and process until completely smooth. This won't seem to take long, but the longer you process, the finer the zest will become and the less likely you'll be to end up with all the zest sinking to the bottom of the popsicle mold.

Taste and add additional honey or lime as desired. Note that the flavor will develop as they freeze.

P.S. We used this popsicle mold for the photos. It’s the popsicle mold I use most often. I love that the lid holds the sticks in place so they don’t shift around after you shut the freezer door. Brilliant.

Source: One Lovely Life

Strawberry Watermelon Popsicles

Strawberry Watermelon Popsicles // One Lovely Life
The strawberries add just enough substance to give these a gorgeous texture. The lime zest and juice adds an incredible little punch, and the end result tastes so much more spectacular than you’d think three ingredients could possibly manage.

This is a GREAT way to use up left over watermelon after a party or watermelon that you bought and thought would be good....and not so much. 


Serves: about 10 popsicles

INGREDIENTS
  • 3 heaping cups cubed watermelon
  • 1 heaping cup strawberries (fresh or frozen)
  • zest and juice of 1 lime

INSTRUCTIONS

Place all ingredients in a blender and puree until completely smooth. Pour into popsicle molds and freeze 3-4 hours, or until very solid.

P.S. We used this popsicle mold for the photos. It’s the popsicle mold I use most often. I love that the lid holds the sticks in place so they don’t shift around after you shut the freezer door. Brilliant.

Source: One Lovely Life

Lava Flow Strawberry Pineapple Popsicles

Lava Flow Popsicles (GF, Vegan, Paleo) // One Lovely Life

These were so, so good. A creamy pineapple smoothie layer swirled with a fresh strawberry layer. Yummy. And made a repeat all summer.

This is one of those recipes that looks deceptively tricky. These are as easy as can be. You mix up two small batches of smoothie in your blender, then alternate adding a spoonful or two of each into your popsicle mold till they’re full. I’ve found this works much better than trying to swirl the two mixtures together with a knife or toothpick. When I try to swirl them, everything ends up just mixing completely together and you don’t get that pretty marbling I love.

If your fruit isn’t very sweet, you may want to add a little drizzle of honey. We typically leave it out, but let your taste buds be your guide.

Feel free to use fresh or frozen fruit (or a combination) for this recipe. It all works!

Serves: about 10 popsicles

INGREDIENTS

For the pineapple swirl:
  • 1½ cups pineapple
  • 1 cup mangos
  • ½ cup - ¾ cup coconut milk (I use canned)

For the strawberry swirl:
  • 2 cups strawberries
  • 3-4 Tbsp orange juice
  • 1 Tbsp honey (optional)

INSTRUCTIONS

For the pineapple swirl:
  • Place ingredients in a blender and puree until completely smooth. Add additional coconut milk as needed.

For the strawberry swirl:
  • Place ingredients in a blender and puree until completely smooth.

To assemble:
  • Alternate scoops of pineapple and strawberry smoothies into popsicle molds. Insert popsicle molds and freeze until completely solid.

Tip: If you use paper cups, freeze the popsicles about 30 minutes, then insert the popsicle sticks. The sticks will shift less this way.

P.S. We used this popsicle mold for the photos. It’s the popsicle mold I use most often. I love that the lid holds the sticks in place so they don’t shift around after you shut the freezer door. Brilliant.

Source: One Lovely Life


Vegan Chocolate Birthday Frosting

The Best Vegan Chocolate Frosting // One Lovely Life


Ingredients

  • 3 oz unsweetened chocolate, roughly chopped or broken up or you could use semi-sweet chocolate chips in a pinch
  • 2 Tbsp coconut oil
  • ⅓-1/2 cup almond milk (dairy or other nondairy milk also ok)
  • 1 tsp vanilla extract
  • ¼ tsp almond extract or 1tsp brewed coffee*
  • ¼ cup unsweetened baking cocoa powder
  • 3-5 cups powdered sugar

The Best Vegan Chocolate Frosting // One Lovely Life

Instructions

In a small saucepan, gently melt together chocolate and coconut oil until smooth and glossy. Remove from heat and slowly stir in the almond milk, vanilla, and almond extract. Mixture will thicken.

Transfer chocolate mixture to a large bowl. Add powdered baking cocoa. Using a hand mixer (or your muscles), blend in 1 cup of powdered sugar at a time until you've reached your desired consistency.

If the mixture gets too dry, thin it out with a little more almond milk as needed. If the mixture gets too thin, add a little more powdered sugar. You should reach a nice thick frosting texture between 4-5 cups of powdered sugar. Use immediately for best results.

This will yield enough frosting for the tops of a 2 layer (8-9") cake, or 1 (9x13) pan.

* You know how Ina Garten (she's one of my favorites, and of course lots of other people suggest it too) swear by adding a little coffee or extra vanilla to a chocolate-y recipe to enhance the chocolate flavor? My secret weapon is a combination of vanilla and a little almond extract. It’s not enough to be overpowering, but I often have people ask what was in my recipe. They love the little something extra it brings to the table, and I totally agree. I love a little almond extract.

Source: One Lovely Life

Wednesday, March 23, 2016

Lemony Chickpea Burgers

Spiced millet and chickpea burgers with preserved lemon yoghurt recipe | DeliciousEveryday.com #vegetarian:
These vegetarian burgers are fluffy, lemony, and tasty! And perfectly portioned—1 serving of protein and 1 of grain in each 2-patty serving.

If you can’t find Greek seasoning at your store, just use the suggested substitution.

Phase 1 and Phase 3
Serves 3
Prep time: 25 minutes
Total time: 35 minutes

Ingredients

  • 1/2 medium shallot, roughly chopped
  • 15-ounce can chickpeas, drained
  • 1 garlic clove
  • Zest of 1 medium lemon, plus juice of half
  • 1/4 to 1/2 teaspoon ground cumin
  • 1 teaspoon Greek seasoning (a mixture of salt, marjoram, pepper and oregano. If you can’t find it, you can sub 1/2 teaspoon sea salt and 1/2 teaspoon oregano)
  • 1 small bunch cilantro, roughly chopped
  • 3 tablespoons egg whites (or 1 large egg white)
  • 3 slices of sprouted grain bread, ground into breadcrumbs in a food processor or blender

Directions

In a food processor with the blade in, add the shallot and chop finely. Add the rest of the ingredients except the breadcrumbs, and pulse until mixed well but still slightly coarse. Add in about 3/4 of the breadcrumbs and pulse until the mixture comes together and is uniform.

Form 6 small burgers. The mixture will be slightly wet (if it’s sticky, you can put water on your hands to make it easier to form the burgers). Spread the remaining breadcrumbs on a plate, and press both sides of each burger into the breadcrumbs to coat. Chill the burgers in the refrigerator at least 10 minutes.

Heat a nonstick skillet over medium heat. Once it’s hot, add the burgers 2 or 3 at a time, and cook for 3 to 4 minutes until golden brown on the first side. Flip the burgers, reduce the heat to medium-low, cover to steam slightly, and cook another 3 to 4 minutes. Watch carefully so they don’t burn!

Serve the burgers on top of salad greens and veggies, sprinkled with your favorite vinegar—I like a fruity balsamic. For Phase 3, you can use 1 egg instead of the egg whites, and use your favorite oil to fry the burgers. Avocado in the salad would be delicious!

Source:  Hayley Pomroy

Coconut Sour Cream

The Best Vegan Sour Cream:

Makes about 1/2 cup | Prep time: 5 min.

Ingredients

  • Cream from 1 15-ounce can coconut milk
  • 1 or 2 tablespoons lemon juice
  • 1/8 teaspoon sea salt

Directions

In a medium bowl, whisk together the coconut cream, lemon juice and salt until combined.

Adjust salt to taste and add more lemon, if desired.

Refrigerate for about an hour before serving to allow flavors to combine.

Depending on the coconut milk you buy, your sour cream might end up a little grainier than dairy sour cream. You can also strain it through a fine sieve if you want it extra smooth. That’s it!

Source:  Haylie Pomroy